Azuki Yōkan Dessert

As I wrote in my last blog, I love azuki beans.

I recommend Azuki Remedy Tea for supporting the kidneys and bladder.


If you haven’t read my blog on the Azuki Remedy Tea recipe and why it supports your kidneys and bladder, I recommend checking it out here.


When I do macrobiotics counseling, I recommend azuki bean remedy tea to many of my clients and encourage clients to make and drink azuki tea at home. 


I’m often asked, “What should they do with the azuki beans after making the tea?” 


The azuki beans after the azuki bean remedy tea can be used in cooking dishes or desserts.


Azuki and Kabocha Squash Dish/Stew (Love, Sanae,” cookbook page 209)

Azuki bean soup

Azuki spread (jam)/azuki glaze (Love, Sanae,” cookbook page 217)

Azuki desserts include Yōkan, Oshiruko, and Zenzai.

and more


I had been doing healing work for a client who was hospitalized in a room with central air conditioning. After visiting the hospital  2-5 times a week for 2 months, my body felt cold and started getting lower back pain, so I made an “azuki bean remedy tea” to support my kidneys and nurture myself. It made me feel warm, soothed, and relieved the pain.


I also made azuki yōkan (sweet bean jelly) with the beans after I made the azuki remedy teas for the first time in a while.

It was delicious.

I shared auzki yōkan with my new friend, Roni.

She loved it and asked me how to make it, so here is the recipe.


Azuki Yōkan Dessert’s recipe

Ingredients:

1 cup cooked azuki beans – I used the azuki beans after Azuki Remedy Tea ( Azuki Remedy Tea Blog)
4~5 tablespoons rice syrup/beet sugar 
2~3 tablespoons agar*
1 teaspoon maple syrup (optional)
Fruits (optional)

1. Cooked azuki beans:
1) If the azuki beans are soft, you add a half cup of water and start heating it up, and add rice syrup or beet sugar and mix well.
2) If the azuki beans are not soft yet, then you need to add one cup of water and cook for another 30 minutes or till the beans are soft.
After the beans are soft, add rice syrup or beet sugar.
2. Once the sweetener is mixed well, you can taste it. 
Make sure it is mildly sweet enough. 
The Yōkan in Japan typically utilizes two types of Azuki bean paste: Tsubu-an (coarse, mashed bean paste) and Koshi-an (smooth, sieved bean paste). Additionally, it contains a significant amount of refined sugar.
I use azuki beans after cooking as it is, so I don’t make any paste, but if you want, you can also make it into a paste.
3. You add agar and mix to cook(simmer)  for 8~10 minutes or so.
4. You transfer it to a mold/glass container to cool it off. 
Then you can put it in the refrigerator.
5. To serve azuki yōkan, cut them like cake, and if you like, top with fruit, then serve. 
You taste yōkan, and if you need more sweetener, then you might add a tiny amount (a teaspoon) of maple syrup on top.

* Agar is a food that is expected to be highly effective against lifestyle-related diseases such as obesity, high blood sugar, high blood pressure, and high cholesterol.


Sometimes, I want to make it softer like jelly or sweet sauce, then I reduce the agar or omit it altogether. I then eat it as jello or use it to make azuki glaze (Love, Sanae,” cookbook page 217) and drizzle it over cooked apples, peaches, and other fruits.

I hope you enjoy making Azuki Remedy Tea and Azuki Yōkan!

*Yōkan (羊羹) is a wagashi which, is a Japanese confectionery made of red bean paste, agar, and sugar. It is usually sold in a block form and eaten in slices.

Love,
Sanae ❤️

Azuki Remedy Tea for Supporting Kidneys and Bladder

One of my favorite beans since childhood is the azuki bean, also known as red beans by some people. 

In America, some people spell it adzuki instead of azuki.

Azuki beans are very popular in Japan. 

They are the second most popular bean after soybeans, holding a prominent place in both traditional and modern Japanese cuisine. 

I love eating azuki beans with sweet rice (sticky rice), which is called Osekihan お赤飯 (recipe on “Love, Sanae” cookbook page 37). 

Osekihan is often served on special occasions, particularly celebrations in Japan. Japanese people often serve Osekihan at happy events. It could be the celebration of a birth, a birthday, graduation, admission to school, or a celebration of a long life. I heard that the red color is a symbol of auspicious and powerful spells that can ward off disaster. Osekihan also served the role of talisman at various occasions.

Osekihan is usually made with 2/3 cup rice and 1/3 cup red beans, but my grandmother used 1/3 cup rice and 2/3 cup red beans. It was a very deep reddish color, full of red beans. I remembered it being my favorite!

Azuki beans are also used for soup and desserts.

In macrobiotics practice, we eat azuki beans to support the kidneys and bladder. The kidneys and bladder are more susceptible to issues during the wintertime, making azuki remedy tea particularly beneficial during this period.  

Even in summer, when we’re living in a cold, air-conditioned room, many of us may have health issues with our kidneys and bladder –  the kidneys become contracted, creating tight muscles around them and intensifying even our thinking. The kidneys do not like a cold environment, so wearing a cotton belly warmer or a cotton tank top underneath your clothes, even in summer, and drinking warm tea, especially adzuki tea, can help improve urinary function and reduce swelling. 

Adzuki beans play an important role in treating constipation, supporting heart health, and aiding the kidneys and liver, serving as a diuretic and detoxifier.

Adzuki beans also contain niacin, a vitamin that stabilizes the mind.

I recommend drinking Azuki remedy tea to relax both your body and mind.

Recipe: 

Azuki Remedy Tea (“Love, Sanae” cookbook page 197)

Ingredients:

1 cup (200 g) dry azuki beans

4 ~6 cups filtered water

2-inch piece of kombu sea vegetable


1. Rinse the azuki beans with filtered water, strain them, and place them in a pot with filtered water.

2. Bring it to a boil without a lid, add kombu, and simmer with the lid for 1-1.5 hours.

3. Now, azuki remedy tea is ready, so you can drink it on an empty stomach between meals to enjoy and support your kidneys and bladder.

4. Once the azuki remedy cools off, save the rest for later in the refrigerator. When you drink it, you need to heat it by simmering (do not boil).

I’ll post a recipe for using leftover azuki beans to make a dessert “Azuki Yōkan” next time. 

Try making and drinking azuki bean tea, which helps support the kidneys and bladder by eliminating waste and excess water from the body through urine!

Love,

Sanae❤️

Extra information about Kidney:

The kidneys not only “excrete waste products,” but also use the urine concentrating mechanism to regulate the amount of water in the body and the concentration of substances called electrolytes, such as salt and potassium. Acidic substances that are constantly produced in the body are excreted through the kidneys, keeping the body slightly alkaline.  The kidneys excrete waste products and excess water from the body as urine. When this function declines, excess water remains in the body, causing gradual weight gain and swelling.

Making St. John’s Wort Flower Oil for Pain and Ache

2025 has been an unexpectedly active year for me as I have been teaching sashiko workshops, caring for my oldest dog Lumi, and helping to heal for a long-time client who lost her husband last year.


My seasonal handwork included completing 20 pounds of Miso making in March, as well as 25 pounds of fresh Ume plum work in May (Umeboshi plums, Ume plum enzyme syrup, Umeshu -plum wine, and Loquat Tincture) in June.

I did not make time to write about them for my blog post, but summer is here.


I foraged several medicinal plants/herbs over the last two months, every month, when visiting our vacation house in North Fork, California. One of my favorites in summer forging is St. John’s Wort flowers!

They do not resemble any special flowers, so you probably missed them.

I like to use them to make infused oil or tincture, etc.


The hypericin (a substance found in St. John’s wort, credited with chemical and pharmacological properties similar to those of antidepressants) gives oil or tincture a reddish color, which is so beautiful.


They have so many benefits.

  • Skin Care:
    • Wound Healing: St. John’s wort oil is traditionally used to promote the healing of minor burns, bruises, wounds, and other skin irritations. 
    • Anti-inflammatory Properties: It may help reduce inflammation and soothe irritated skin, making it beneficial for conditions such as psoriasis. 
    • Antioxidant Support: The oil contains antioxidants, including hyperforin and hypericin, which can help protect the skin and maintain its natural radiance. 
    • Hydration: It can help hydrate dry and cracked skin, improving overall suppleness. 
  • Mood and Mental Wellbeing:
    • Mild Antidepressant Effects: When used topically, St. John’s wort oil may help uplift mood and promote a sense of calm and well-being. 
    • Stress and Anxiety Relief: It may help reduce tension, stress, and anxiety. 
  • Pain Relief:
    • Muscle Comfort: The oil can be used in massage to relieve muscle soreness and discomfort. 
    • Nerve Pain: It has been traditionally used for nerve pain, including neuralgia and sciatica. 


I was making today for pain and ache relief oil. I injured my legs and feet when I had a near-death car crash in 2001. I was told I would never walk. It took a long, long time, but I am walking because I never gave up making an effort. One of my daily efforts is massaging my legs, feet, toes, and hands. Yes, 365 days for over 20 years. St. John’s Wort is one of the medicinal oils I use for massage.


I usually use them fresh, but I dried them this year, and they are now ready to be mixed with oil.

They say fresh can make more potent oil, but I don’t mind creating a dried one as well since I have experienced the benefits even with dried St. John’s oil.

.

It is very easy to make, so I hope you try them.


  1. Put St. John’s Wort flowers about 3/4 of the way up your glass container. St. John’s Wort has almost no scent, so if you like lavender flowers, adding them will add fragrance.
  2. Add oil, such as olive, sunflower, or rice bran (I use organic, unrefined sweet almond oil), to the top to cover the herbs.
  3. Infuse the oil:
  • Sun Infusion: Place the sealed jar in a warm, sunny location for 2-4 weeks, or longer, which is a traditional method. It helps extract beneficial compounds, such as hypericin and gives the oil a reddish color.
  • Warm Infusion (optional): Some methods suggest using a low-temperature crockpot or warm oven if sunlight isn’t preferred, although some sources believe sunlight is essential for extracting specific compounds.
  • Shake or stir the jar daily, especially in the first week, to ensure even Infusion. 

4. Strain the oil: After the infusion period, strain the oil through a cheesecloth, muslin cloth, or fine-mesh sieve into a clean bottle. Let the oil settle for a day or two and then carefully pour off the clear oil, leaving behind any residue. 

5. Storage: Store the finished oil in a cool, dark place, ideally in a dark glass bottle to protect it from light. Refrigeration can help extend its shelf life. When stored properly, the oil can last for at least 6 to 9 months, and potentially up to a year or two. 


Important considerations

  • St. John’s Wort can interact with certain medications and increase sensitivity to sunlight. Always consult with a healthcare professional before using St. John’s Wort, especially if you are taking medications or have health conditions. This information is for educational purposes only and not a substitute for professional medical advice. 

Happy Summer Seasonal Hand Work!


Love,

Sanae ❤️

Seasonal Handwork-Miso Making

Ever since childhood, I have been interested in making things that take time and effort.

It’s nice to have convenient and easy things to do, but I was not interested in them. 

My elementary school teacher and my parents called me “slow” since I took longer than others to do many things.
So, when I started practicing macrobiotics, I thought that macrobiotics, which require careful time, were suitable for me.

Many people say that macrobiotics is difficult and challenging, but what macrobiotics teach is the principle for humans to live a healthy life, so it’s not complicated.
But it changes by season, the type of people’s constitution, and their health condition, so since we (humans) are so out of touch with nature, it has become too complex.

Of course, it takes time and effort to be done.

But learning anything for the first time isn’t easy; you’ll improve with practice and practice. For example, playing the piano in music or playing tennis in sports can only be done easily if you are incredibly talented.

The reality for me is that after getting sick and being unable to walk due to a near death car accident, I had to think about my own lifestyle and how to live. Then, I practiced what I could and practiced again and again, and finally, I could do it comfortably.

In fact, it wasn’t until I had more leeway in my life that I started making traditional Japanese handmade items and other items little by little. I now make about 10 different products (e.g., Miso, Yuzu pepper, Rice bran pickles, Natto, Orange marmalade, Umeboshi plums, Ume plum enzyme juice, Ume plum sauce/jam, Rakkyo pickles, Red ginger pickles, and Dried whole persimmons) every year with help of my husband, Eric.

I’m a tortoise, so I slowly prepare to welcome the new year every year. At the beginning of January, I start writing down my goals for the year ahead, and then February arrives.
Around that time, I start making miso.
It is the perfect time to make miso.
Because the temperature is low, fermentation can take place slowly and thoroughly.
During the cold season, there are fewer bacteria, which can prevent mold growth.
One of the reasons is that you can use soybeans that have just been harvested in the fall.


Nowadays, many people use miso within about three~six months of making it, and miso companies also need a place to store it. If it takes time, it will take time to sell, so it seems like a sad situation that more and more companies are selling their miso in a short time after they make it.


In fact, when miso is left to age for two or three years, amino acids and vitamins that are not present in soybeans or are present in small amounts are produced through fermentation, increasing its nutritional value. Soy protein is broken down by enzymes and becomes water-soluble, and some of it becomes amino acids. Among them are eight types of essential amino acids that are essential for maintaining life, as well as vitamins (B1, B2, B6, B12, E, K, niacin, folic acid, pantothenic acid, piotin) and minerals (sodium, potassium, calcium, It contains abundant nutrients such as magnesium, phosphorus, iron, zinc, copper, iodine, selenium, chromium, and molybdenum), monounsaturated fatty acids, polyunsaturated fatty acids, and dietary fiber.
The salt mixes well with the soybeans, giving the dish a rich, umami flavor rather than a salty taste.


Therefore, I recommend using miso that has been aged for 2 to 3 years, but these days, aged miso is almost impossible to buy and is inconvenient.
We can’t find aged miso sold in the Japanese market and health food stores where we used to buy it here in the United States (near Los Angeles), so the miso they sell tastes salty.
I haven’t lived in Japan for a long time, so I don’t know much about what kind of miso is sold in Japan, but aged miso is probably hard to find in Japan as well.

So, I decided to make my own miso a while ago after I recovered from stage IV cancer, only weeks live.
This year, I pulled out the miso in the earthenware pot I made two years ago. The aroma and taste are great. I wish I can share them here.
Of course, I have so much love for this miso because I have been growing it with my care for two years.

I made miso soup with my two-year-old miso.


I only needed to use less than the usual amount of miso I used to get the flavor.
It was so delicious!
The miso can be used in various dishes such as stir-fry, stew, dip, and miso dressing and many more.

You can easily see the benefits of miso on the internet if you look into it.
Promotes digestion and absorption – has the effect of working on the digestive organs.
When you absorb the salty taste of miso soup into your body at the beginning of a meal, your stomach and intestines begin to move, allowing for efficient digestion and inhalation, which reduces the burden on your body.

Suppression of blood cholesterol levels
Soybean lecithin and soybean peptides contained in soybeans can suppress the rise in blood cholesterol.

It has also been reported to have other beneficial effects, such as neutralizing nicotine, preventing cancer, and preventing aging. And much more!


Making your miso is not difficult, so why not give it a try?

Here is the recipe I have been using.

Miso making recipe:
・Organic dried soybeans) 300g
・Koji (rice malt or barley malt) 200g
・Sea salt 120g
・Earthware container/pot
・Storage cotton cloth

What to prepare

・Stainless steel pot, colander, bowl,
 · Ladle
・Wooden pestle,
・Organic cotton cloth or Cheesecloth
・Baking sheet
・Weight
・Vinyl gloves (only for those who are interested)
・Alcohol spray or shochu or salt (only for those who are concerned)
・Stainless pot, calendars, bowl, 
・Vinyl gloves (only for those who are interested)
・Alcohol spray or shochu or salt (only for those who are concerned)


1. Wash the soybeans 2 to 3 times.
2. Add three times as much water as the soybeans and leave it overnight.                               Soybeans will expand by 2 to 2.3 times. It takes about 8~12 hours! Remove the skins from the float beans to the top and drain the water.


3. Add enough fresh water to cover the soybeans, heat over high heat at first, and once it boils, remove the scum. Then, boil slowly over medium heat and add the water if you need. Take a form out with a ladle. It depends on the pot, but the approximate cooking time is about 3~5 hours.


4. When the soybeans are soft enough to be crushed between your thumb and little finger, turn off the heat and drain the broth using a colander.

Keep some cooked broth to add to making miso later.
Boiled soybeans are perishable, so I recommend making miso as soon as possible.
(if you don’t prepare them right away, store them in the refrigerator.)


5. Now, make the shiokiri koji.


Add sea salt to naturally thawed koji to mix them well.
I usually mix a little by little by hand.


6. Place the boiled soybeans in a bowl and crush them by a wooden pestle and hand until they are no longer in shape. I like to keep some of the beans as they are so they have texture when miso is made.

It’s easier to mash it when it’s warm.
(if it’s been refrigerated, you can warm it up a little.)


7. Add salted koji to the soybeans and mix. Check the moisture level and add a small amount of cooked soybean broth (usually around 10 to 50 ml) to reach the consistency of your earlobe. The secret to making it delicious is to mix it well.


8. Mix until there are no leftover soybeans left, then roll a handful at a time like a rice ball. Then, place them one by one in a container (I use a ceramic jar) and press them down to flatten the surface while removing the air. The sides are prone to mold, so make sure they are flat.


9. Spread organic cotton cloth, thin cheesecloth, etc., flat on the surface, and place a baking sheet on top to prevent air from entering.

Some people find it practical to spray alcohol on the surface (if you don’t have one, sprinkle shochu or salt lightly and evenly) to reduce the amount of mold that grows, but I don’t do that.


10. Finally, add a weight (preferably about 30% of the weight) and put a label to complete.

Where to Place:
Place the container away from direct sunlight. No Refrigerators! Miso has the property of absorbing odors, so avoid placing it near things with strong odors.
If you are planning to do Tench Gaeshi, I recommend that you write down the date of preparation, around the time of Tench Gaeshi and when it will be ready to sue so you don’t forget.

Tenchi Gaeshi:
Tenji Gaeshi is good to do between mid-July and early August. Remove the weight, baking sheet, and cloth, then remove any black mold that has formed on the surface. The whitish stuff is called acid-film yeast and is not harmful to the body.
However, mixing it with miso will spoil the flavor of miso, so try to remove it as much as possible. Flip the miso upside down to incorporate air. It eliminates the carbon dioxide produced during fermentation and introduces oxygen to promote better fermentation. This is sealed again, as shown in numbers 8 to 10 in the diagram on the left, and left to ripen until winter.

Purpose of Tenjigaeshi:
・Remove the mold so as not to spoil the flavor of the miso.

・Turn it upside down and release the generated gas.

・ Sends oxygen

・Promotes enzyme activity

・Uniform the hardness


Completion
The expected completion date is at least one year. Miso becomes more delicious after the hot summer (possibly two summers), and you can start eating it as early as you like after the summer has passed. I recommend two years aged miso.

When it is finished, remove any mold and turn it upside down to make it even. Additive-free miso will continue to ferment, and the color will darken, but it will not spoil and can be enjoyed for a long time. If you want to stop fermentation, put it in the refrigerator. If you use it while fermenting it, store it at room temperature and remove the mold before eating.


If any of you make Miso using my recipe and have questions, let me know.

Love, 

Sanae ❤️

Spring is Pickles Time!  

I have learned a lot since I moved to America, and the Five Elements of Macrobiotics were one of the significant lessons that changed my life.

 I grew up in Japan, where people live seasonally.

The four seasons are commonly heard of, but traditionally people have lived by the five seasons of spring, summer, late summer, autumn, and winter, so it made sense to me.

It also reminded me of the *”seasonal hand-work” that my grandmother and mother used to do when I was little. *”seasonal hand-work” means making something with your hands each season.

I started to follow the seasonal rituals of Japanese tradition much later as I began to appreciate nature and season changes, even while living in Santa Monica in Southern California, where the five seasons are not as apparent. 

Winter is not harsh here, but I noticed the contractions and tightness of the energy of the air and my own body so I appreciated the vegetables and fruits that grow in the winter.

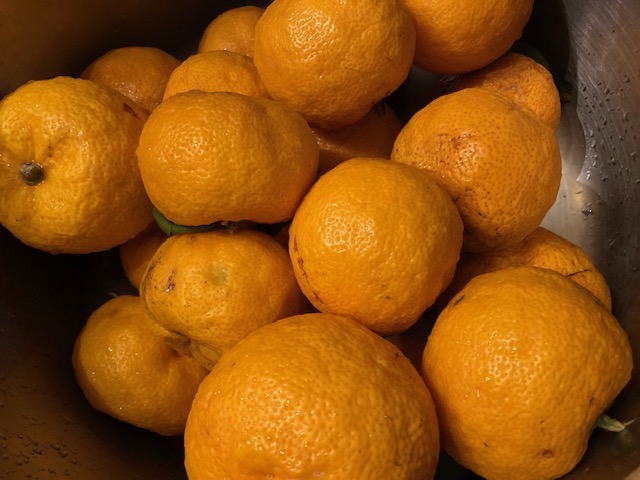
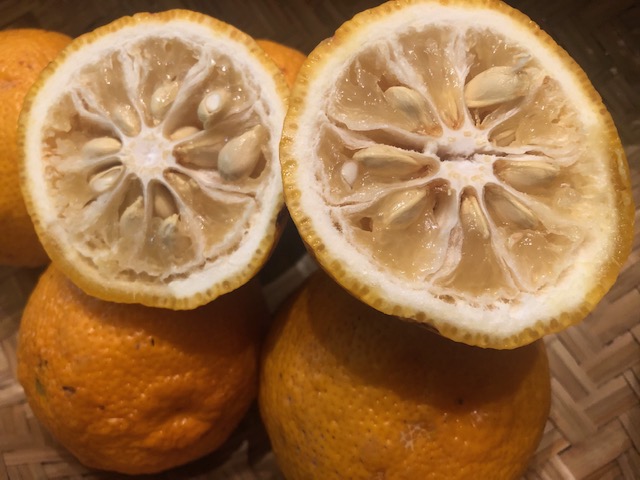
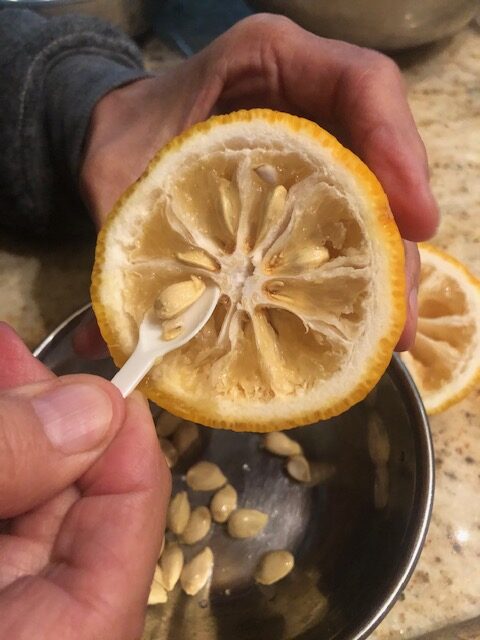
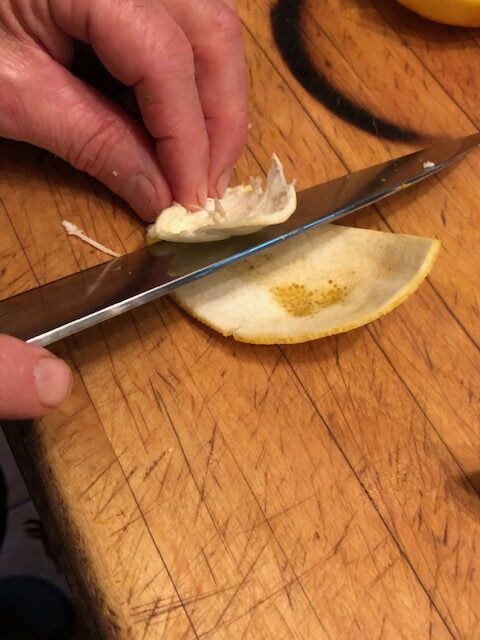
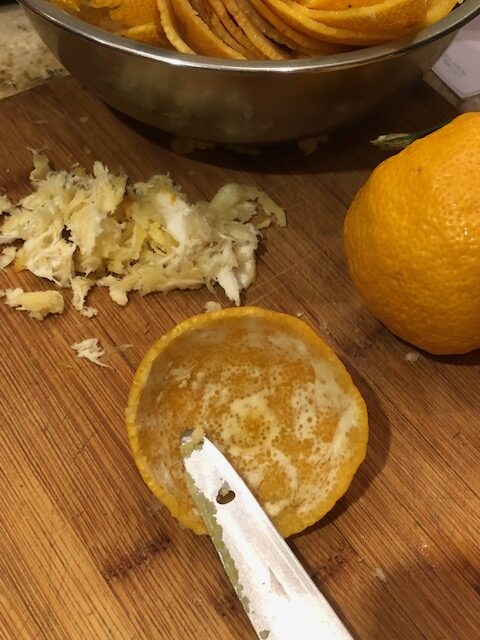
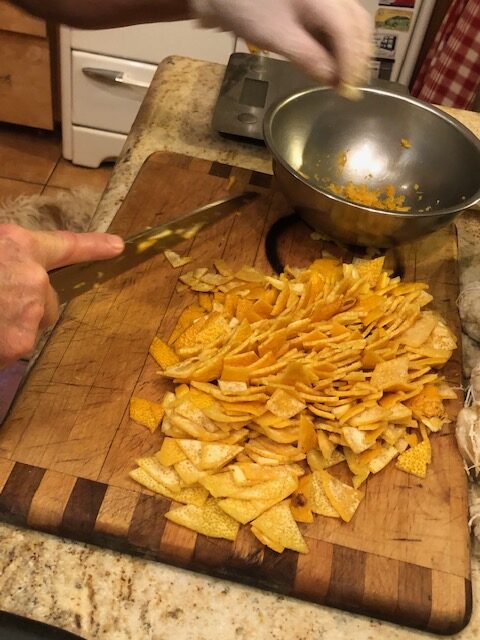
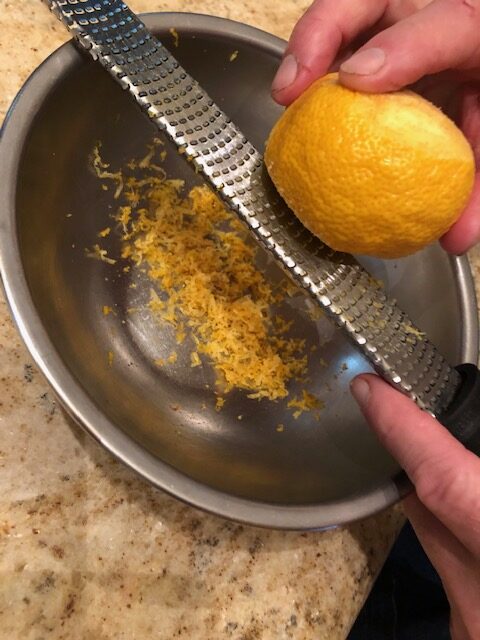
Seasonal hand-work in January is making apple jam and citrus marmalade (usually mandarin). However, this year I made yuzu marmalade with my husband for the first time, and it came out very delicious. ), I also made kumquat syrup for sore throats. 

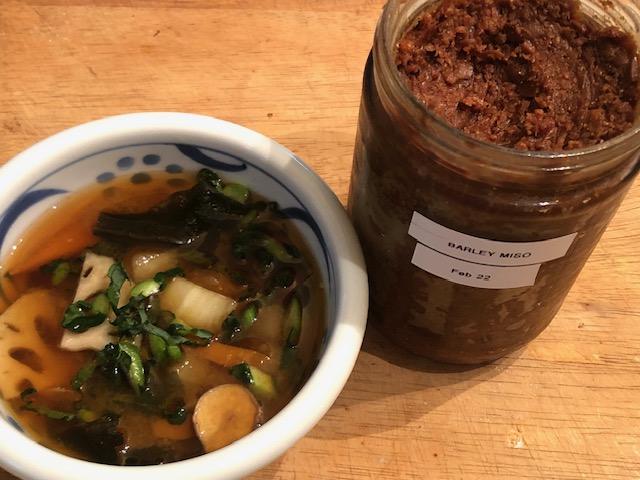
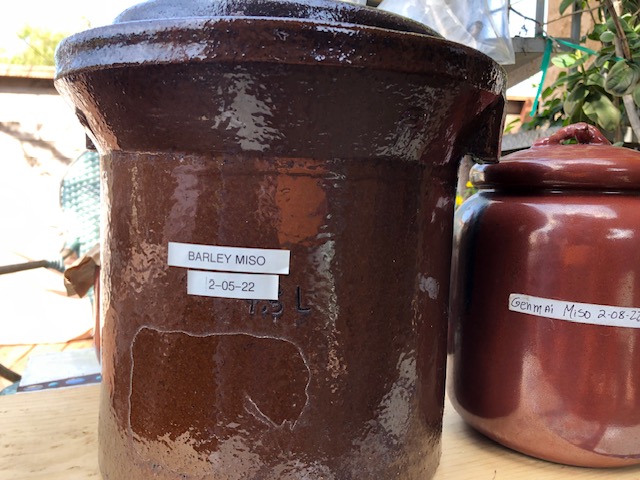
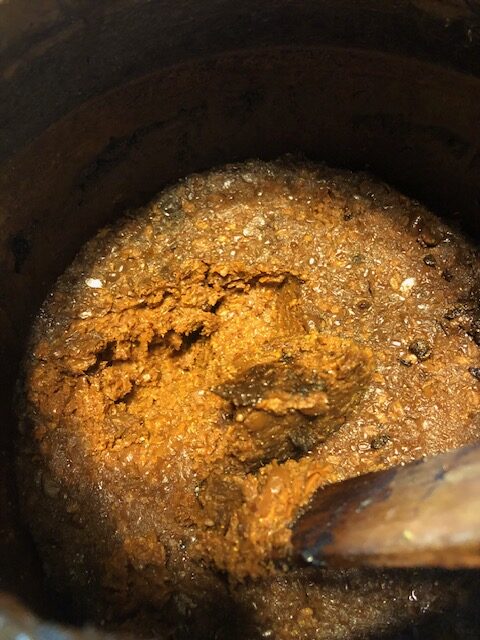
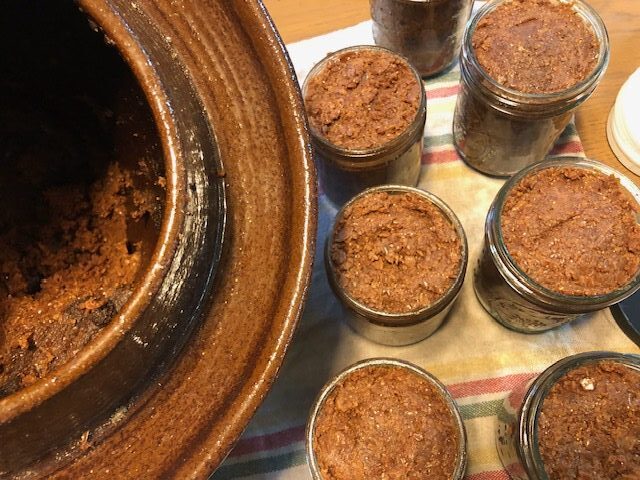
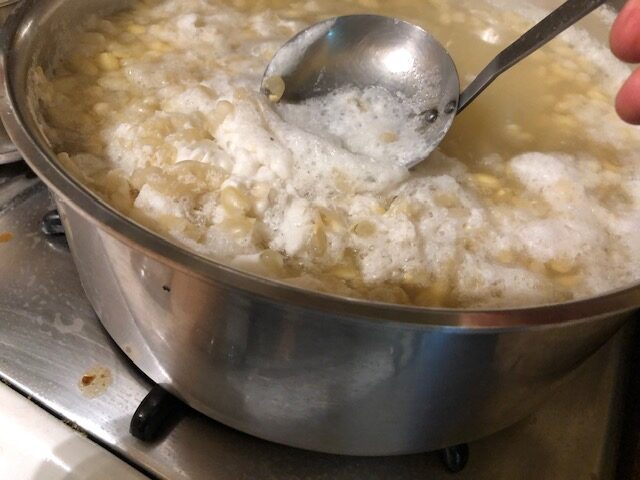
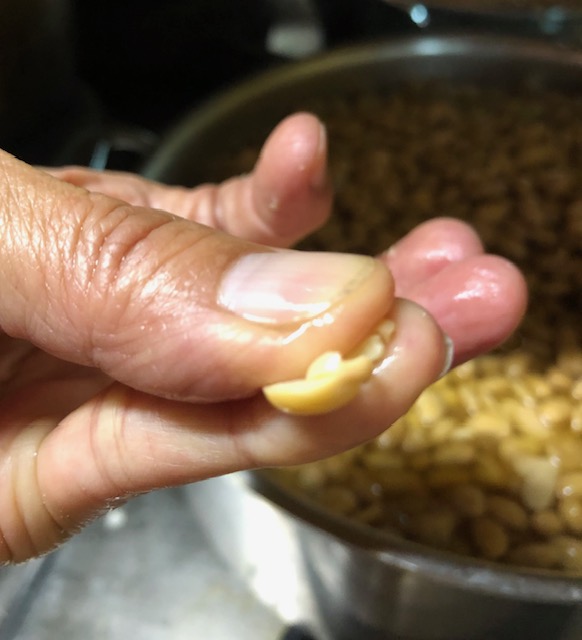
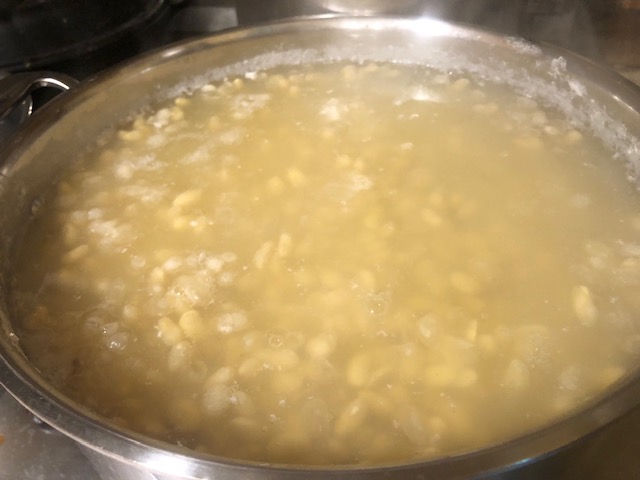
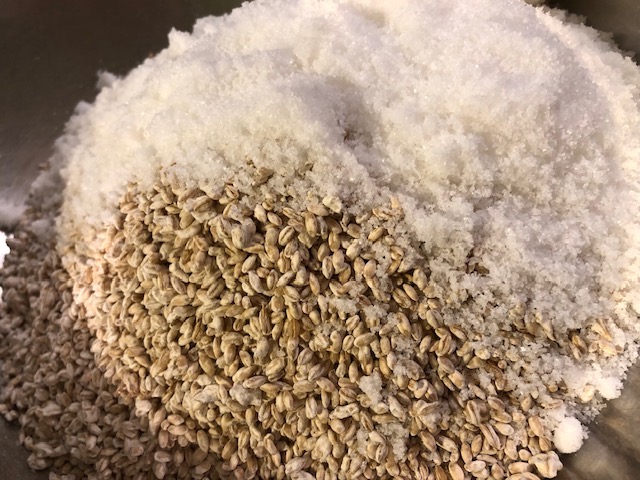
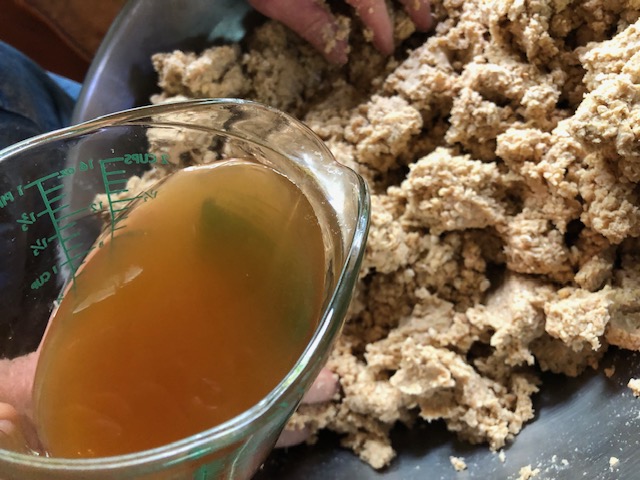
February is miso-making. I make barley miso and rice miso in small amounts, and I feel the new year is here.

Then, spring suddenly emerges in Santa Monica and pushes winter out every year. 

In spring the energy rises up, and the taste of sourness supports liver and gallbladder functions by the Five Elements.

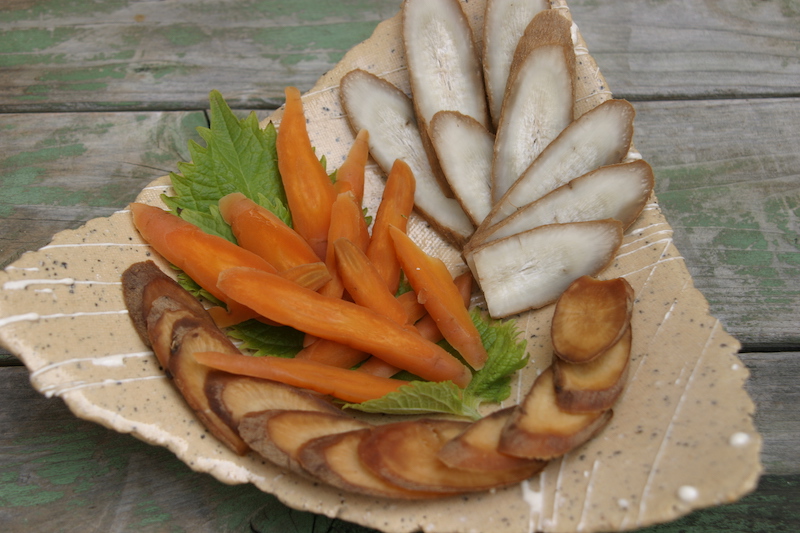
I prepare my nuka doko (brown rice bran pickles bed/base)for nuka pickles: start roasting the new brown rice bran and adding it to the old nuka doko to prepare my nuka pickles for March.

I like daikon radish nuka pickles and kabu) (Japanese turnipbefore the weather gets warmer. Once the weather gets warmer, I like cucumber nuka pickles. Another one is asazuke pickles (shorter-time pickles that taste more salad-like lightly pickled pickles).

In Japan, pickles (tsukemono) have been one of the staple foods, along with rice and miso soup, for a long time.

There were almost always pickles in each meal. I was not too fond of traditional Japanese pickles when I was younger because they smelled funny and were too salty and too sour. I only ate koji pickle, which had a sweet taste.

My mother always said, “Oh, you did not touch your pickles…finish your pickles. It is good for you!” She also often said, “Don’t worry you will like pickles when you grow up.”

She never told me why pickles were good for me and how much I had to grow before I like them, and I did not bother to ask.  

When I came to America to study English, still, I didn’t like any of the American pickles, but I tried relish pickles, and I liked them because they were sweet.

When I studied Macrobiotics in 1993 for the first time, I found that pickles are essential to our meals. The processing of pickling allowed for the preservation of foods throughout history, and pickles are a staple food in various regions worldwide. Fermented pickles promote lactic acid bacteria, which help our digestion, strengthen intestines, assimilate food, and fight diseases. They provide the health benefits of fiber, vitamins, and antioxidants and increase appetite. 

I have been loving all kinds of pickles since I have “grown up” enough to understand the benefits. I have been making homemade pickles, traditional Japanese pickles: umeboshi plum (you can see my blog for the recipe https://sanaesuzuki.com/2021/05/29/santa-monica-homemade-umeboshi-plums/), nuka pickles, and nontraditional pickles called asazuke (short-time pickling), like pressed salad in Macrobiotic recipes.

I had read in Japanese historical literature that pickles started in the Nara era (710~794) as preserved food with salt. It showed that vegetables such as eggplants and melons, as well as fruits such as peaches, were pickled in salt, mainly for temple monks as side dishes.  

In the Heian era (794~ 1191), pickles were introduced as side dishes: bracken, butterbur, and melons were pickled in salt in the spring. Eggplants, persimmons, and pears were pickled in salt, miso, moromi (raw unrefined sake or soy sauce mash), and sake kasu (sake lees) in the fall. 

In the Kamakura era (1180~1336) to the Muromachi era (1336~1537), because of the development of tea ceremonies and use of monkō (incense), people began to eat pickles more and more, and they learned not only to sense the taste and aroma with their senses of taste and smell, but to enjoy the atmosphere and aroma of the place with their heart. It can be said that this is related mainly to the fact that Japanese people enjoy a delicate and subtle sense of taste and smell. Pickles have the effect of renewing the sense of taste and smell, so they were served in tea ceremonies.  

In the Edo era(1600~1868), the variety of vegetables increased, and many merchants from all over the country began to gather in Edo. As a result, different methods of making pickles were devised. Until then, foods were pickled for storage purposes, but research began to allow foods to be pickled for a short time for consumption more readily.

The emergence of nukazuke has had a major impact on household pickle-making. In times like this, when food shortages and conservation of the environment are of great concern, reusable rice bran beds are critical. 

In the Meiji era(18681912), farmers in the suburbs of Tokyo and other urban areas started making takuan-zuke and narazuke (variety of Japanese pickles) as side businesses. 

In the Taisho (19121926)and Showa (1926~1989) eras, the pickle manufacturing industry started to boom.

Over the years, there have been an amazing variety of pickles that have been made in Japan, and I am not kidding.

I heard there are currently over 1,200 pickle companies in Japan, and they make at least five~ten different kinds, so you can imagine how many pickles are made all the time besides local homemade ones, which each family has prepares with various recipes. 

Most commercial pickles use instant seasoning MSG, non-natural salt, and sugar to numb consumers’ tongues and create false flavors. Making homemade pickles using quality natural ingredients is safer for our health and improves taste. 

These are the nine pickles that are the main varieties in Japan today:

1. Salt pickles (shio zuke)

  • Simplest and most common types of pickles.
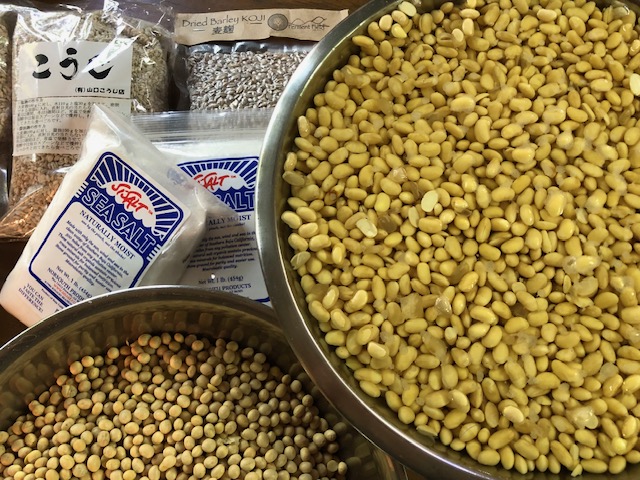
2. Rice Bran (nuka zuke

  • Household pickles are fermented in a mixture of roasted rice bran (the hard outer skin of the rice that is removed when polishing the rice grain), salt, kombu, and other ingredients. 

3. Sake Lees (kasu zuke

  • Pickles are preserved in a mixture of sake lees (the yeast mash that is left over after filtering sake), salt, sugar, and sweet cooking wine (mirin).

4. Vinegar (su zuke

  • Pickles brined in vinegar are known as Su zuke. Rice vinegar is commonly used as the pickling agent and lends a crunchy texture and sweet and sour flavor to the resulting pickles.

5. Miso (miso zuke)

  • Pickles are made by covering vegetables in miso, a fermented soybean paste.

6. Soy Sauce (shoyu zuke)

  • Pickles are preserved in a soy sauce base.

7. Koji pickles (koji zuke)

  • vegetables, fish, other meat, etc., are pickled in base (toko/doko), which is made by mixing koji with sugar and salt.

8. Mustard (karashi zuke)

  • Pickled in mustard mixed with sake and rice malt after being pickled in salt.

9. Lightly pickled (asa zuke)

  • Pickled with seasoning for a short time. You can easily make it using various vegetables such as napa cabbage, radishes, and cucumber.


I want to share Japanese pickles recipes that I have been making for spring. 

Nuka Pickle ((Brown Rice Bran Pickles) edited from Love, Sanae cookbook

It is my favorite pickle in spring-sour, salty, and pleasantly pungent taste with a satisfyingly crunchy texture and refreshing flavor.

For the nuka bed:

1 pound nuka (brown rice bran)

2 cups purified water

2 to 4 tablespoons sea salt

2-inch square piece of kombu kelp (5cm)

one cup “starter” vegetables (carrots, cabbage, daikon, etc.), coarsely chopped

To make the nuka bed:

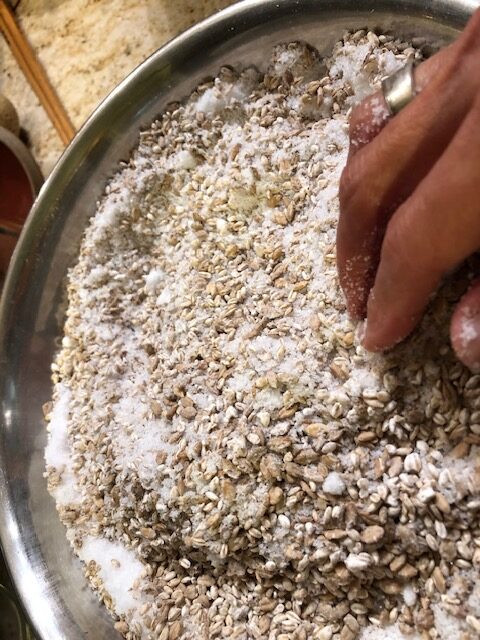
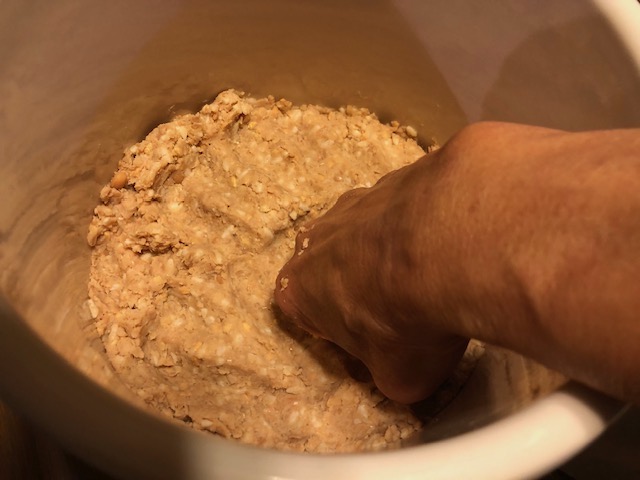
1. The first batch of nuka doko is very important in making nuka pickles. In a large skillet over medium-high flame., dry roast the bran (nuka) until the color changes slightly and the smell of bran intensifies. When evenly roasted, turn off the heat and allow it to cool.

2. In a small saucepan, boil the water. Add the sea salt and stir to combine. Add kombu, turn off the heat and let it cool.

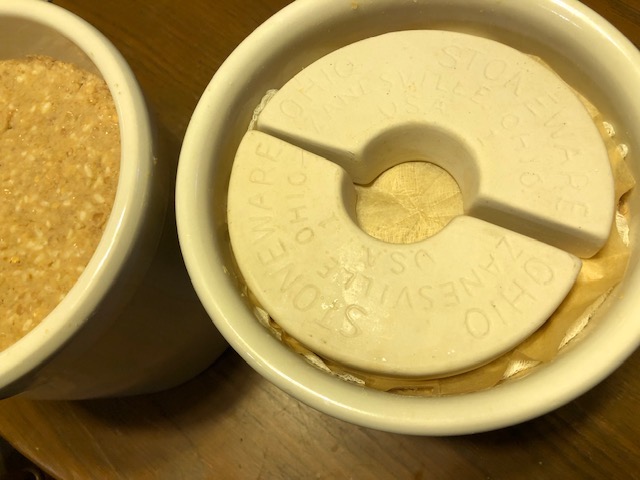
3. Transfer cooled-off nuka to a ceramic crock, wooden barrel or enamel container. Add the kombu water mixture. Using your hands, gently combine the ingredients to form the nuka doko, or basis of the brown rice bran pickle bed.

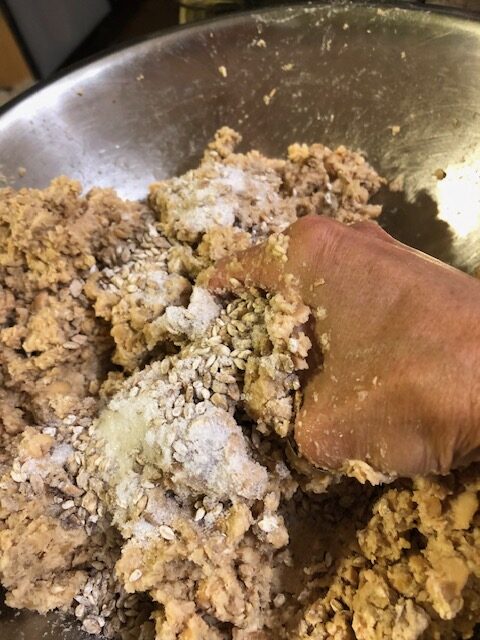
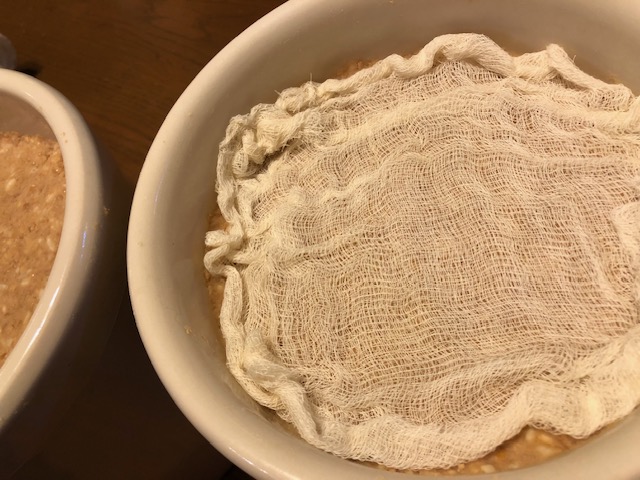
4. Add chopped starter vegetables (dry them with a kitchen towel to take moisture out) which help to stimulate the fermentation process. Cover the crock with a clean cotton cloth and allow it to sit overnight.

5. Mix the nuka by hand once daily for the next 3 to 5 days. After this time, remove and discard the starter vegetables (I put them in the compost). The nuka doko is ready to make your delicious pickles.

6. Make sure vegetables (dry them with a kitchen towel to take moisture out) are ready to eat in a day, a couple of days to one week, depending on the kind of vegetables. Root vegetables and bigger sized vegetables take longer, and leafy vegetables and smaller sized vegetables take a shorter time.—For example, carrot- 2~3 days, red radish- 1 day, and small whole cucumber- 1 day.

7. Once you add vegetables, leave the crock in a cool dark area and mix vegetables daily. 

If you cannot mix them daily, you can leave them in the refrigerator for a few days to a week. If you have kept it too long, the vegetables get more sour and salty, so make sure you rinse them with water.

If you are going out of town for a while, keep nuka in the refrigerator without vegetables. You can usually use the nuka bed to re-start making nuka pickles by adding a new roasted nuka to the old nuka bed to refresh.


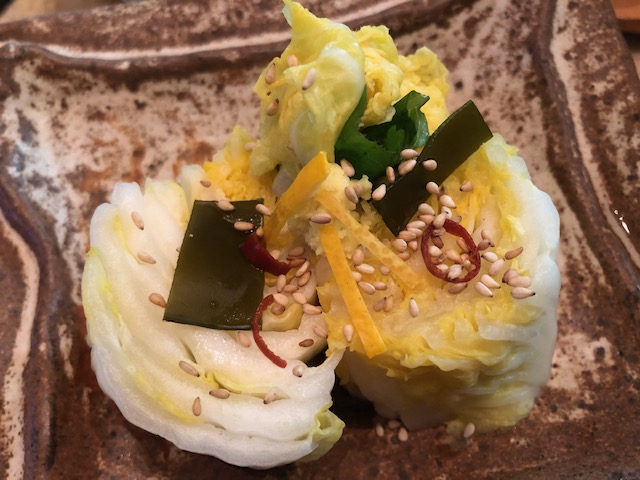
Asazuke Napa Cabbage Pickle

Popular pickle with a refreshing taste for someone who loves crispy and light vegetables.

Ingredients

  • 500 g napa cabbage (about half of whole)
  • 80 g red radish (option)
  • 20 g carrots (option)

Seasonings

  • 10~20g sea salt 2~4% of the total weight of the vegetables
  • 1 sheet kombu kelp 5cmx8cm/2”x 3.2″(Approximately 0.5 to 1% of the weight of the vegetables)
  • 5 g ginger root shredded (optional)
  • 2~4 dried red chili pepper without seeds sliced into rings to taste (optional)
  • water (1/3 of the container)
  • weight – Approximately 1.5 ~ 2 x of the weight of the vegetables

1. Gather all the ingredients.

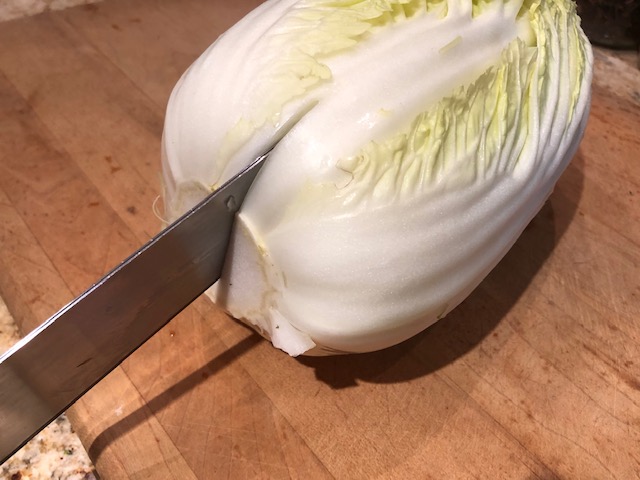
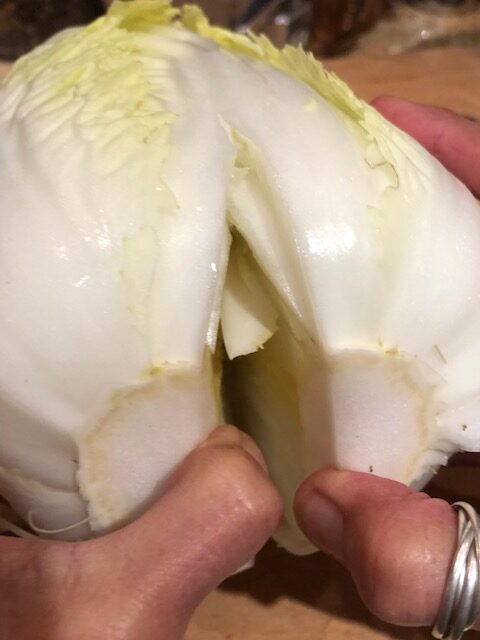
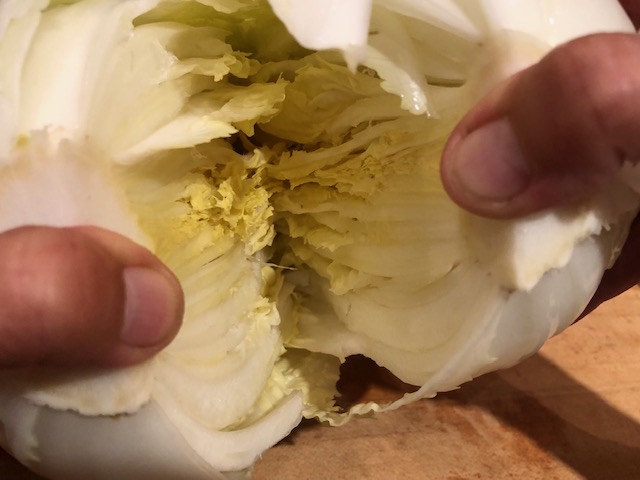
2. *Cut napa cabbage: Make an incision about 5 cm (2 “) deep from the base of the napa cabbage and tear it into two pieces. It will make them not come apart. Furthermore, insert a kitchen knife in the same way, tear it apart, and divide it into four pieces. If the nap cabbage is large, you can split it into 6 to 8 pieces.

3. Add water to about 1/3 of the capacity of the pickle’s container and add salt to dissolve.

4. Arrange the cabbage in the same direction. If you need to layer the second ones, put half the salt on the first layer and sprinkle red chili pepper and kombu. Place the remaining napa cabbage in the opposite direction, place them in the second row, and sprinkle with the remaining salt. Press it firmly with your palm while applying it, which helps water rise easily.

5. Put a drop lid on it and use weight (I use big river rocks) to press. 

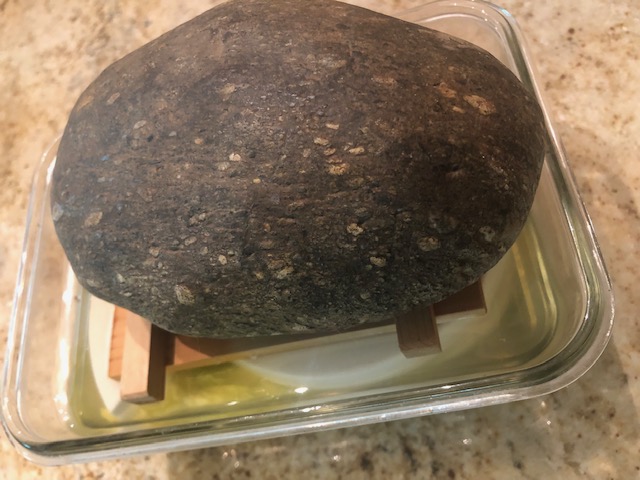
Cover with a thin cotton cloth and leave it for 12 ~ 24 hours (in colder times, leave it for 24~48 hours)

6. When you’re ready to eat, take out just the portion you’re going to eat, squeeze out the juice, rinse with water and squeeze it again.

7. Cut into bite-sized pieces before serving, and add **condiments if you like.

Note: 

  • Cut napa cabbage: if you want the cabbage to pickle faster, cut it into small pieces, but you may lose the crispiness.
  • * Condiments: If you like, add roasted sesame seeds and citrus juice, such as yuzu or lemon or zest, and grated ginger to make it even more delicious!


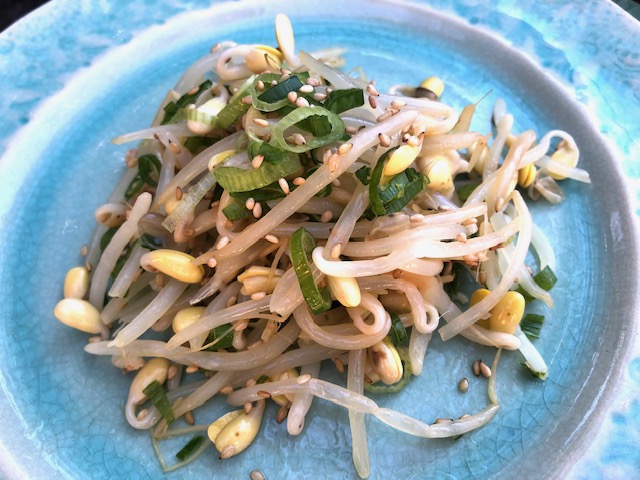
Soy Beans Sprout Quick Pressed Salad Style Pickle

It is not like your usual pickles – My mother made this more to my liking, crispy like a salad and less salty, so I could enjoy it as a child, and I still love it as a side dish.

Ingredients

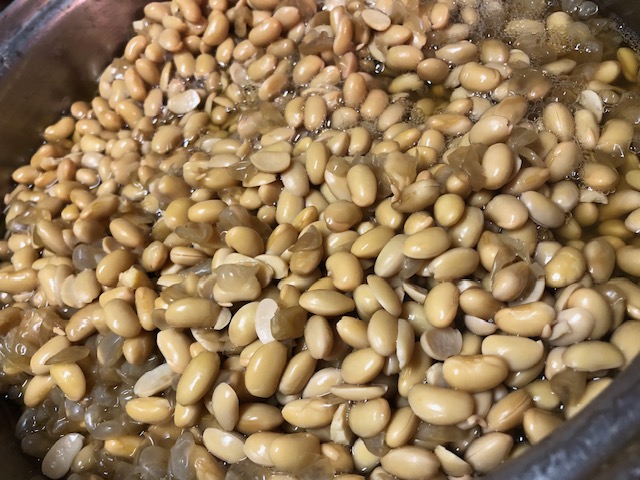
  • 1 pound of soybean sprouts, rinsed and drained
  • 1 teaspoon sea salt
  • 1/2 cup water
  • 1 green onion, chopped
  • 1 teaspoon roasted sesame seeds
  • 1~2 teaspoon toasted sesame oil
  • 1~2 garlic clove, minced (option for people who eat meat/fish)
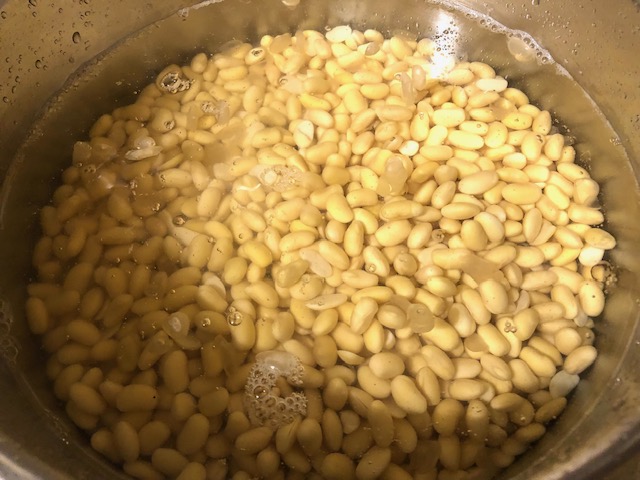
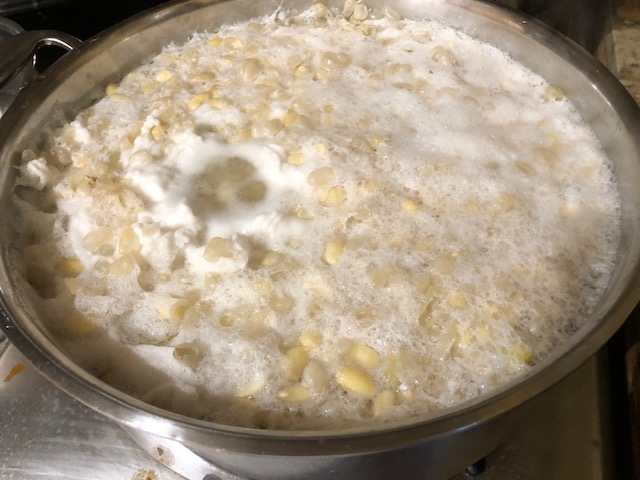
  1. Place soybean sprouts in a pot. Add the salt and ½ cup of water and cover. Bring to a boil over medium-high heat for 5 minutes. Drain.
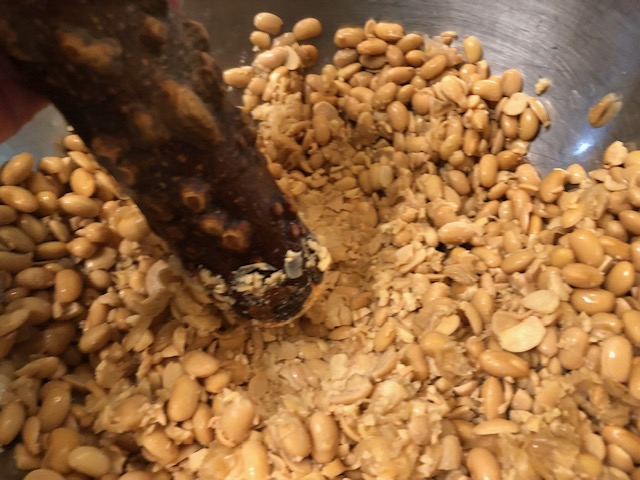
  2. Put the cooked soybean sprouts in a mixing bowl. Add green onion, sesame seeds, and toasted sesame oil and mix well by hand.
  3. Put a lightweight plate as a lid over it to press for one hour. 
  4. Transfer to a serving plate.
  5. Serve as a side dish to rice.

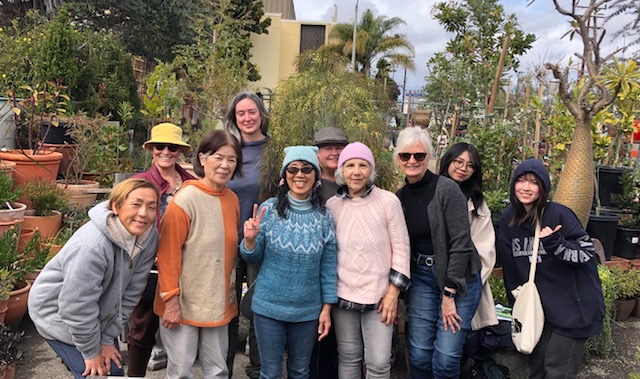
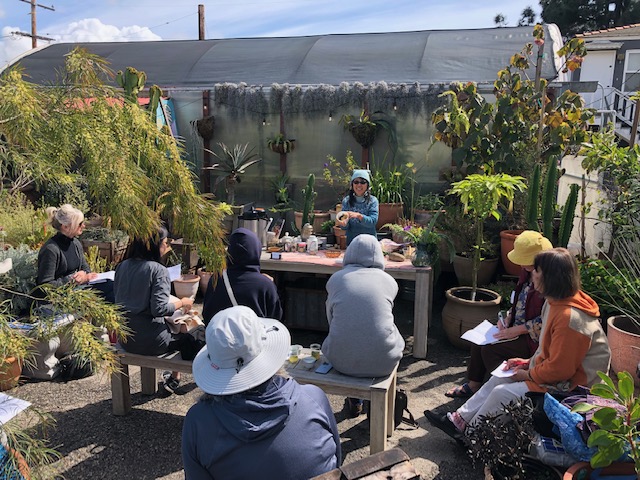
My pickles class on March 5th.

Enjoy your spring pickles!

Love, Sanae❤️

I wrote this article for “Macrobiotic Today” March 15th, 2023 Issue.

Subscribe for FREE: https://madmimi.com/signups/828f181e33dc41d0ae4d59bb5f4f2301/join

Yuzu Kosho -Japanese Yuzu Seasoning/Condiment

In Japan, there are other citrus fruits besides lemons and limes. Yuzu, Sudachi, Kabosu, and Yuko and more. I love Yuzu because of its unique aroma. I have seen more Yuzu in Asian markets last ten years, but I have yet to see other citrus fruits here.

Lemon has a clearing, pungent flavor and a tangy sourness when you put it in your mouth (Meyer lemon is different). The scent of lime is slightly lighter than lemon, but when harvested before the matured stage, it has a solid tangy acidity, and the character is a light yet fresh and pleasant scent than lemon.

Yuzu has different enjoyment tastes depending on harvested time: when it is still green or yellow ripe. After ripening, the juice has a slightly sweet and refreshing flavor and somewhat neutralized acidity.

After about three years of planting a yuzu tree in my garden, I was excited when it finally produced even one fruit. We used it only zest preciously. 

The following year, I harvested a small but a few more fruits. We mixed the zest of green yuzu (green yuzu season from July to August) and the yuzu fruit to make a yuzu paste.  It was simple but so flavourful, and we enjoyed it so much. Since I only harvested a few yuzu fruits, we could only make a small amount of yuzu paste, so we used it for hot pot vegetables and salads, and it was gone in no time.

I wished it would be nice to make it more.

A few months later, a friend in Clovis contacted me she had harvested yuzu, more than she could use, so we went to pick them up on the way back from North Fork. She gave me so many Yuzu fruits!

Wow, somebody was listening to my wish; I was grateful.

I suggested making *Yuzu Kosho to Eric this time.

*Yuzu Kosho is a type of Japanese seasoning/condiment. 

Kosho means in Japanese “pepper or peppercorn,” so usually white or black pepper. Yuzu Kosho originated in Oita, Kyushu (south island).  

Since it is called “kosho” pepper, I thought it would be made with yuzu and white or black pepper, but I found out that in some parts of Kyushu, pepper is an old word that means Japanese chili pepper, not white or black pepper.

I never tasted homemade Yuzu Kosho, and the commercial Yuzu Kosho is usually made with “green yuzu.” 

The yuzu fruits I got from my friend were “ripe yellow yuzu,” so I wondered how they came out as Yuzu Kosho. 

I heard that ripe yellow yuzu has less bitterness, mild taste, less spiciness, and a sweet aroma, so I was excited even before I made it.

I’m not so good with spices, so I used fewer chili peppers, giving a perfect hint of spicy taste blended with a rich aroma!

Yuzu Kosho Recipe

Ingredients:

100g Yellow Yuzu zest

25g Green Chili pepper (Japanese Green Chili is recommended, but we used Jalapeno chili)

25g Sea salt

* These ingredients are what we used – most of the recipes you find they use Yuzu and Chile pepper are the same quantity, and sea salt is one-third of the Yuzu amount. You can adjust how spicy and salty by your preference.

Instruction:

1. Wash yuzu fruits and green pepper with water and dry them with a kitchen towel. 

2. With a knife, remove any black spots on the skin and cut yuzu fruits in half. Remove the seeds (Yuzu has so many seeds I used a tiny spoon to pick them out.) Separate yuzu fruit from the skin. Avoid the white pith under the skin’s surface between the peel and the fruit as much as possible. If you use the pith, it will make the yuzu kosho bitter. We scraped the pith with a knife carefully to take the pith as much as we could.

3. Cut yuzu skin.

4. Remove the seeds and stems of green chili peppers, which have a potent stimulant and can irritate the eyes and skin of some people, so be careful if you have sensitive skin (you might want to use kitchen gloves and don’t touch your eyes or mouth when preparing).

5. Place yuzu skins, green chili, and sea salt into a food processor. Smooth over the ingredients. Keep processing until the ingredients become well combined and smooth. 

When I did not have a food processor, I used a grater.

I did not need to remove the fruit or pith when I used the grater. After washing and drying out the yuzu, grate the skin surface, but I had to remember not to include pith as much as I could. 

I ground the grated yuzu skin first, then finely chopped green chili, and sea salt at last in my Japanese mortar, ceramic Suribachi, and wooden pestle, Surikogi. 

It took time for me to make it this way, so if you are going to use a pestle, be ready to have your patience and time. 

6. Prepare the jars using as hot water bath canning method to preserve the yuzu kosho.

Yuzu kosho is ready to use for dishes. 

I like to keep it in the fridge for at least one week, the spiciness becomes milder, and the flavor is more harmonized. 

If you have juice left, you can use it for dressing or dip sauce with miso or tamari or soy sauce for steamed tofu, dumpling, and potsticker. Enjoy!

One of my cats, Tin Tin loves Yuzu aroma so he stayed in the kitchen while we were making.

Love, Sanae ❤️