Yuzu Kosho -Japanese Yuzu Seasoning/Condiment

In Japan, there are other citrus fruits besides lemons and limes. Yuzu, Sudachi, Kabosu, and Yuko and more. I love Yuzu because of its unique aroma. I have seen more Yuzu in Asian markets last ten years, but I have yet to see other citrus fruits here.

Lemon has a clearing, pungent flavor and a tangy sourness when you put it in your mouth (Meyer lemon is different). The scent of lime is slightly lighter than lemon, but when harvested before the matured stage, it has a solid tangy acidity, and the character is a light yet fresh and pleasant scent than lemon.

Yuzu has different enjoyment tastes depending on harvested time: when it is still green or yellow ripe. After ripening, the juice has a slightly sweet and refreshing flavor and somewhat neutralized acidity.

After about three years of planting a yuzu tree in my garden, I was excited when it finally produced even one fruit. We used it only zest preciously. 

The following year, I harvested a small but a few more fruits. We mixed the zest of green yuzu (green yuzu season from July to August) and the yuzu fruit to make a yuzu paste.  It was simple but so flavourful, and we enjoyed it so much. Since I only harvested a few yuzu fruits, we could only make a small amount of yuzu paste, so we used it for hot pot vegetables and salads, and it was gone in no time.

I wished it would be nice to make it more.

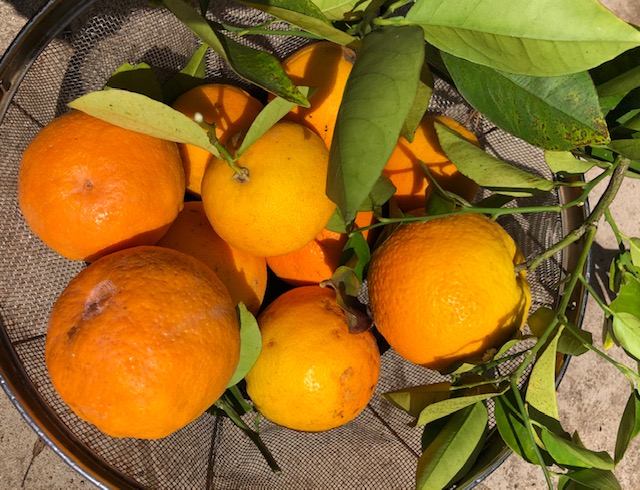
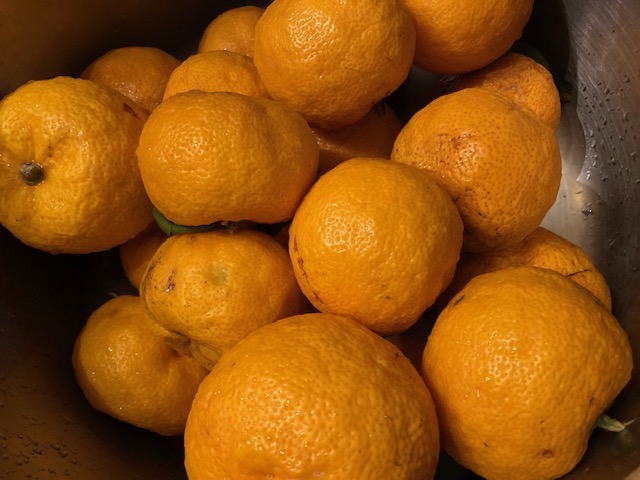
A few months later, a friend in Clovis contacted me she had harvested yuzu, more than she could use, so we went to pick them up on the way back from North Fork. She gave me so many Yuzu fruits!

Wow, somebody was listening to my wish; I was grateful.

I suggested making *Yuzu Kosho to Eric this time.

*Yuzu Kosho is a type of Japanese seasoning/condiment. 

Kosho means in Japanese “pepper or peppercorn,” so usually white or black pepper. Yuzu Kosho originated in Oita, Kyushu (south island).  

Since it is called “kosho” pepper, I thought it would be made with yuzu and white or black pepper, but I found out that in some parts of Kyushu, pepper is an old word that means Japanese chili pepper, not white or black pepper.

I never tasted homemade Yuzu Kosho, and the commercial Yuzu Kosho is usually made with “green yuzu.” 

The yuzu fruits I got from my friend were “ripe yellow yuzu,” so I wondered how they came out as Yuzu Kosho. 

I heard that ripe yellow yuzu has less bitterness, mild taste, less spiciness, and a sweet aroma, so I was excited even before I made it.

I’m not so good with spices, so I used fewer chili peppers, giving a perfect hint of spicy taste blended with a rich aroma!

Yuzu Kosho Recipe

Ingredients:

100g Yellow Yuzu zest

25g Green Chili pepper (Japanese Green Chili is recommended, but we used Jalapeno chili)

25g Sea salt

* These ingredients are what we used – most of the recipes you find they use Yuzu and Chile pepper are the same quantity, and sea salt is one-third of the Yuzu amount. You can adjust how spicy and salty by your preference.

Instruction:

1. Wash yuzu fruits and green pepper with water and dry them with a kitchen towel. 

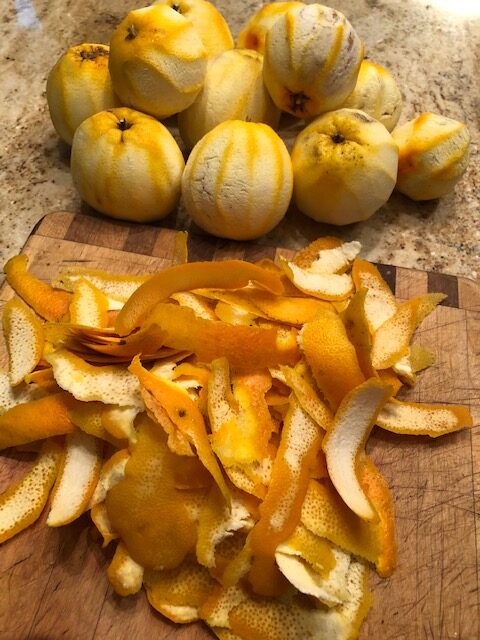
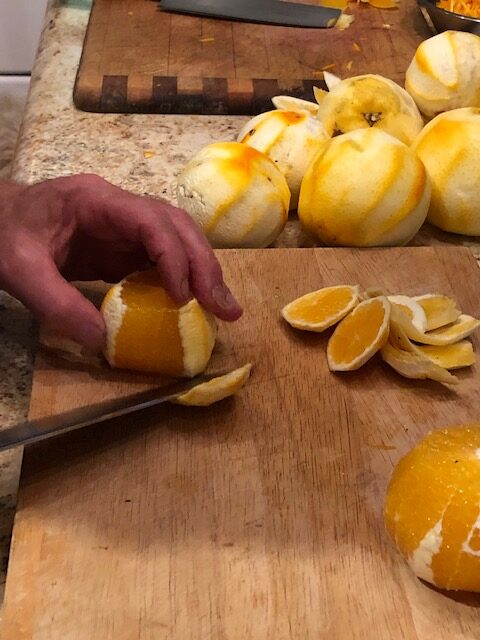
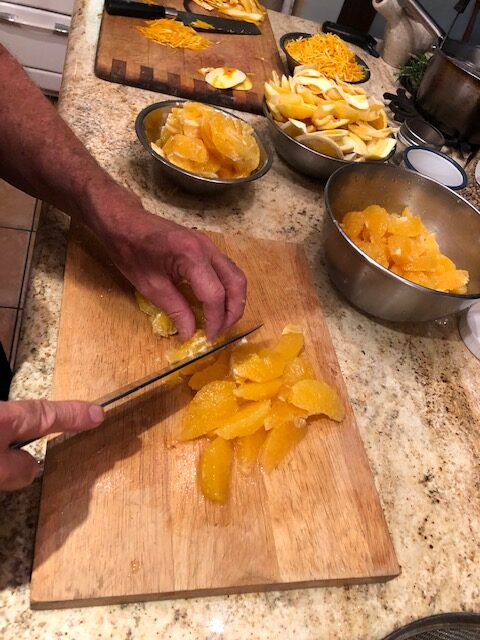
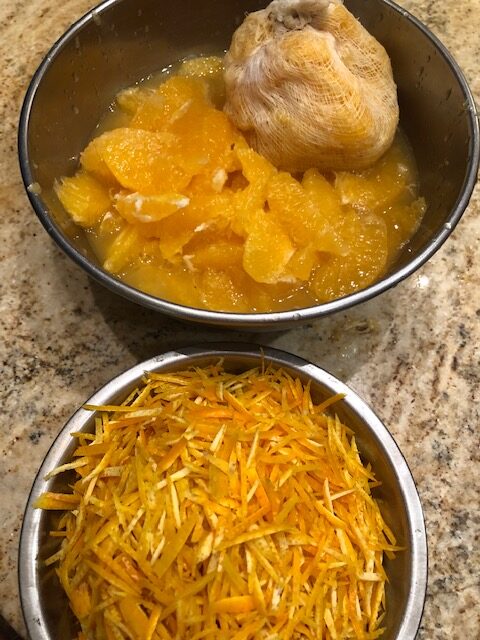
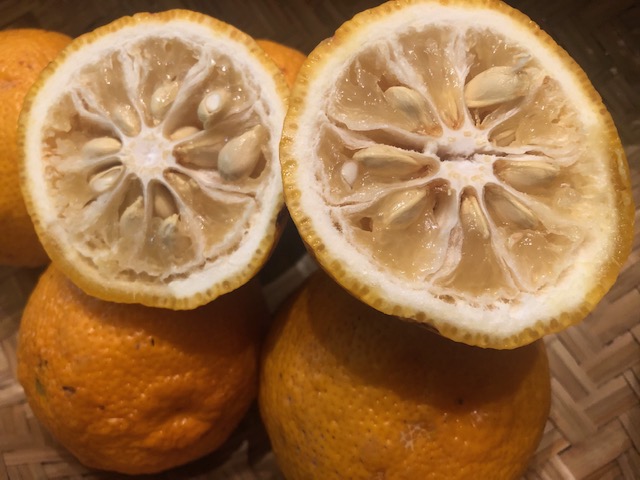
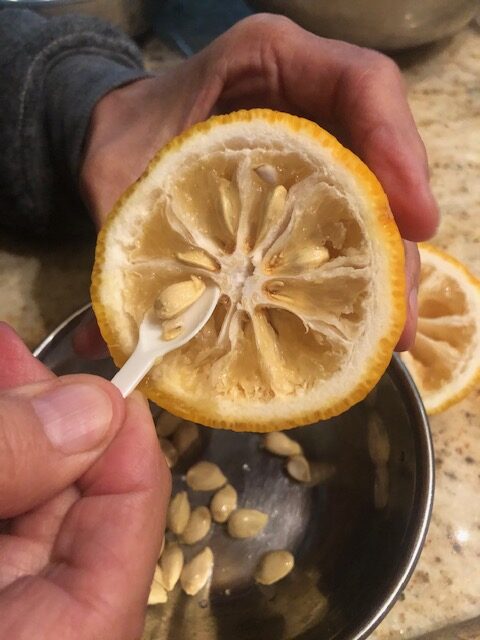
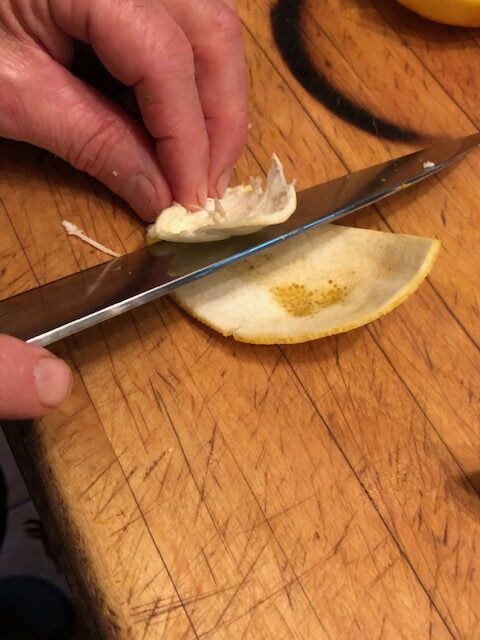
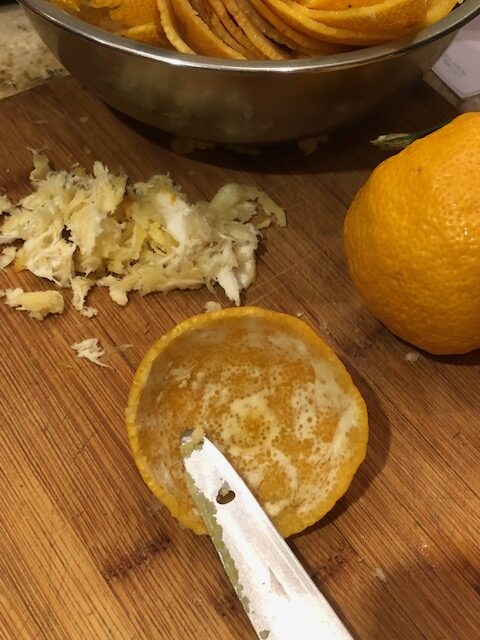
2. With a knife, remove any black spots on the skin and cut yuzu fruits in half. Remove the seeds (Yuzu has so many seeds I used a tiny spoon to pick them out.) Separate yuzu fruit from the skin. Avoid the white pith under the skin’s surface between the peel and the fruit as much as possible. If you use the pith, it will make the yuzu kosho bitter. We scraped the pith with a knife carefully to take the pith as much as we could.
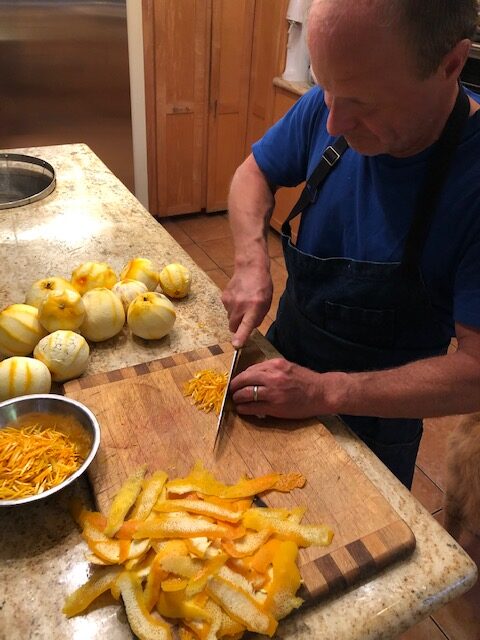
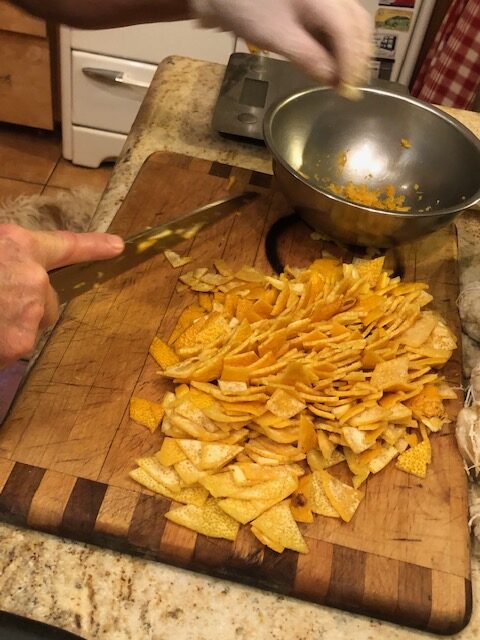
3. Cut yuzu skin.

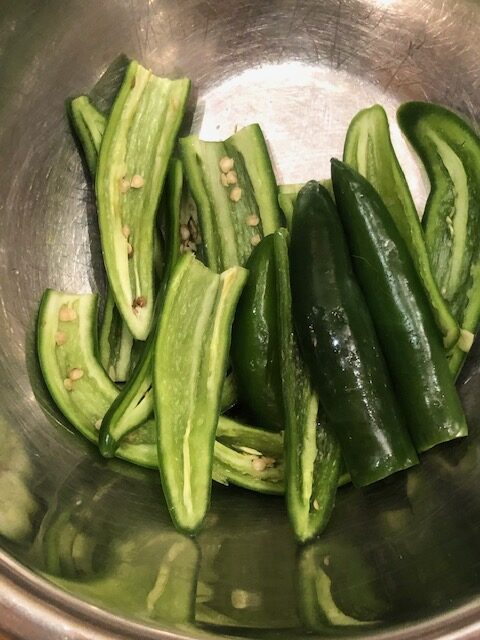
4. Remove the seeds and stems of green chili peppers, which have a potent stimulant and can irritate the eyes and skin of some people, so be careful if you have sensitive skin (you might want to use kitchen gloves and don’t touch your eyes or mouth when preparing).

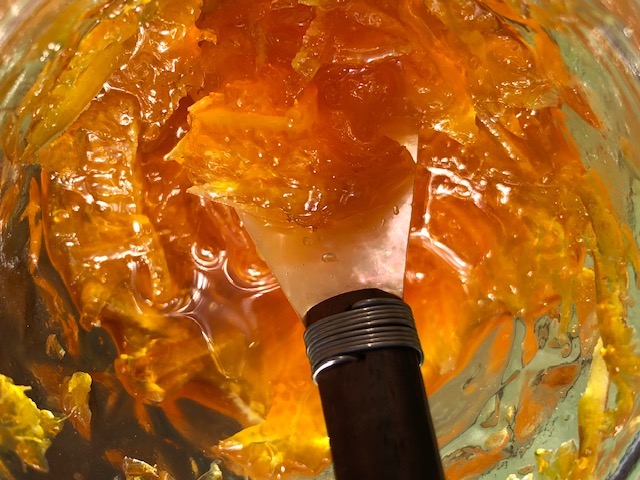
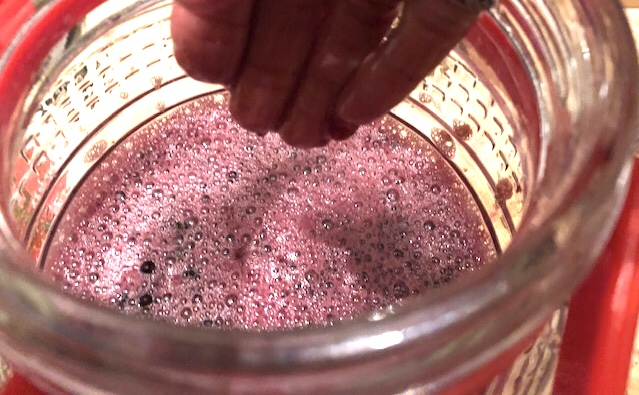
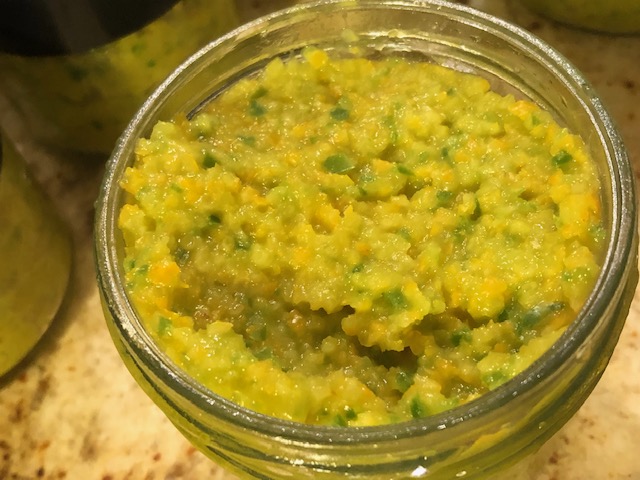
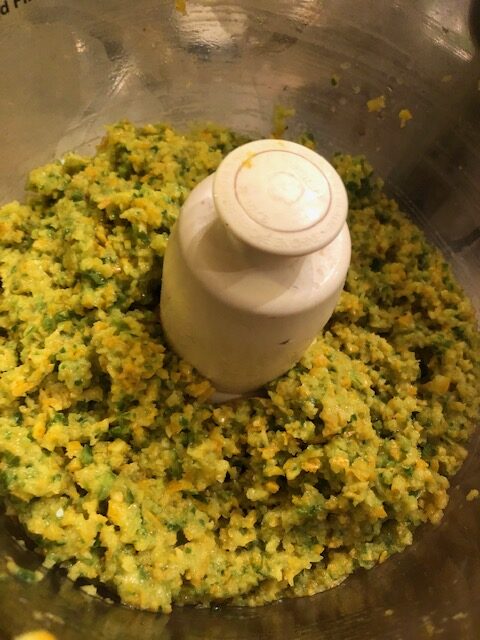
5. Place yuzu skins, green chili, and sea salt into a food processor. Smooth over the ingredients. Keep processing until the ingredients become well combined and smooth. 

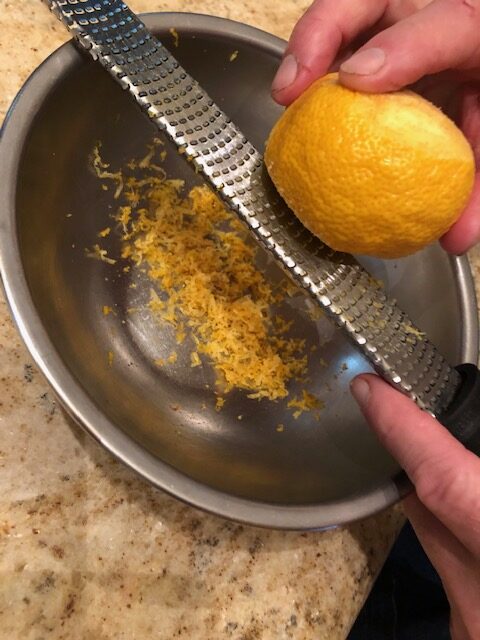
When I did not have a food processor, I used a grater.

I did not need to remove the fruit or pith when I used the grater. After washing and drying out the yuzu, grate the skin surface, but I had to remember not to include pith as much as I could. 

I ground the grated yuzu skin first, then finely chopped green chili, and sea salt at last in my Japanese mortar, ceramic Suribachi, and wooden pestle, Surikogi. 

It took time for me to make it this way, so if you are going to use a pestle, be ready to have your patience and time. 

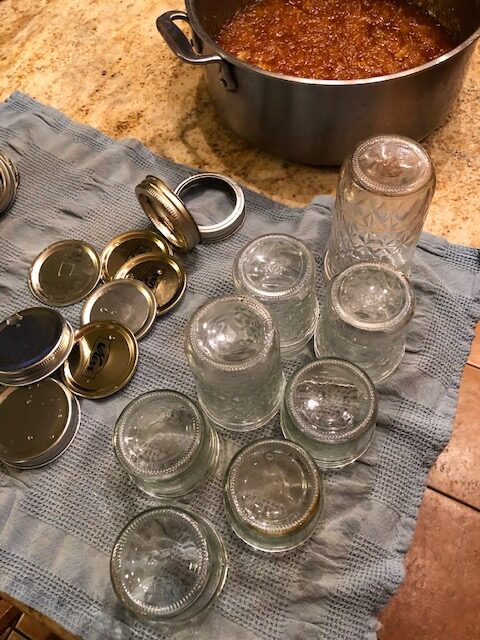
6. Prepare the jars using as hot water bath canning method to preserve the yuzu kosho.

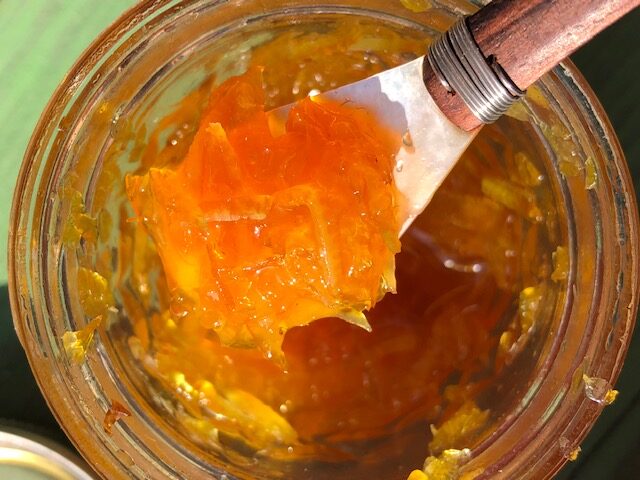
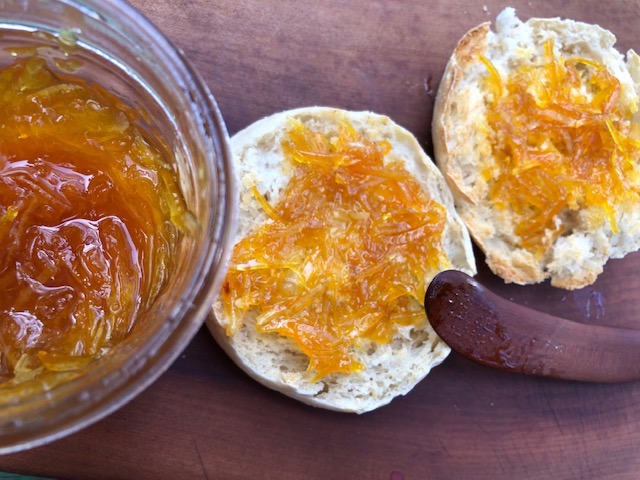
Yuzu kosho is ready to use for dishes. 

I like to keep it in the fridge for at least one week, the spiciness becomes milder, and the flavor is more harmonized. 

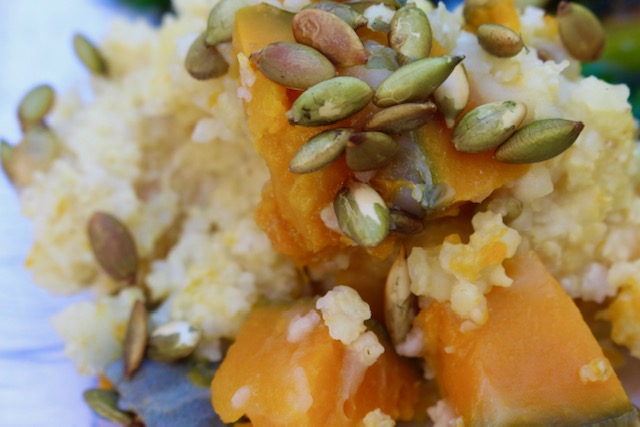
If you have juice left, you can use it for dressing or dip sauce with miso or tamari or soy sauce for steamed tofu, dumpling, and potsticker. Enjoy!

One of my cats, Tin Tin loves Yuzu aroma so he stayed in the kitchen while we were making.

Love, Sanae ❤️

Homemade Orange Marmalade

My month of September was swept away by Covid. 

(I wrote about it on my blog, How I Care for Myself When I Got Sick with “Covid”)

I had a fever for two weeks and could not eat much, but I was craving the comfort food I ate as a child and I had dreams about these foods!

Pancake: my father made it with instant pancake mix only once or twice a year.

Donkey’s Steam bread: When I was a child, it was a popular “donkey bakery” ( a popular bakery that came to town on a donkey-drawn cart and sold various bread).

Orange marmalade: I was not too fond of jam, but I loved orange marmalade with sweet orange skin. Marmalade also sounds something special to me instead of just jam and the golden orange color of the sunshine.

Eric made a flaxseed pancake and a blackberry steamed cake to satisfy the first two. But my craving for orange marmalade still existed, and I thought of it every day.

A few days later, Eric told me the orange tree in my garden had fruits, so maybe we could make it. 

I tried to make it a few years ago, but it was not like what I remember. My memory of Orange marmalade was beautiful orange transparent color, and when I tasted it, my mouth got wrapped in orange flavor, and the skin was soft but tasted crispy.

The one I made was a little bitter because I did not separate the white pith, the orange flavor was not fully there, and the skin was not crispy.

I had to think about the recipe differently this time.

Eric has made jam many times, and when I told him how I made my orange marmalade, he said it sounded like making jam, so it was not marmalade. We talked together and made a new recipe.

The new recipe I wanted to try again was more labor and time, so I asked Eric to help me make it.

How did it come out?

Well, Eric is a skillful chef, so his advice helped as we made it, and it came out perfectly!

What did I change?

The main change was to separate the white pith of skin and cook membranes and seed as pectin in cheese clothes.

Here is the recipe if you want to try it.

Ingredients

  • 5 pounds Oranges (ripe) 
  • 4 cups Water
  • 3~5 cups organic white Beet sugar (depending on how sweet you want)

1. Gather the ingredients.

2. Wash and dry the oranges. Using a sharp paring knife, remove only the brightly colored zest from the oranges. Please do not remove any white pith directly underneath as much as you can because it is very bitter.

3. Thin match sticks the zest. Set the zest aside.

4. Cut the ends off the zested oranges, and then, working with one orange at a time, cut off the thick white pith from around each orange. Discard the ends and white pith.

5. Hold a fully peeled orange and use a sharp knife to cut out each segment between the membranes that have the sections together.

6. Once you’ve cut out all the fruit, squeeze any juice out of the membranes into the bowl of segmented fruit. Set the membrane aside, along with any seeds (the pectin in these will help “set” the marmalade later).

7. Combine the zest, fruit, juice, water, and sugar in a large, heavy stainless pot and bring it to a boil. Stir just until the sugar dissolves, then stop stirring. 

8. Meanwhile, lay a double layer of cheesecloth in a medium bowl and put the membranes and seeds on top. Lift the corners and tie the cheesecloth into a bag to hold the membranes and seeds.

9. Meanwhile, bring the marmalade to 220 F simmering (which took us over 2 hours, so be patient). Then once it reaches 220 F, hold it there for 5 minutes. Do not stir.

10. Remove the pectin bag, squeezing any marmalade out and back into the pot, and discard the bag. Take the marmalade off the heat and let it sit for 5 minutes. Set up three clean pint jars or several small jars like we did with sealable lids (if canning, they should be hot and sterilized) next to the pot.

11. Stir the marmalade to distribute the zest evenly in the mixture. Use a ladle or spoon to transfer the marmalade into the jars, leaving 1/2 inch of headspace at the top of each jar.

12. Put the lids on the jars and refrigerate, or you can proceed with canning.

Enjoy your marmalade!

Love,

Sanae❤️

Vegan Hiyashi Chuka (Cold Ramen)

I grew up loving Japanese noodles of udon, soba, ramen, hiyamugi, and somen so much!

One of my favorite noodle dishes in summer is Hiyashi Chuka (Cold Ramen). It is “Ramen Salad” to me!

When I started to eat vegan plant-based macrobiotic food in 1993, I thought I had to give up eating ramen noodles, but I found some companies were making vegan ramen noodles in 2005 and had been enjoying them since then. 

Eric and I served Goddess Miso Ramen in the winter season at our “Seed Kitchen” restaurant in 2008~2016.

Summertime ramen must be Hiyashi Chuka (Cold Ramen). I had to introduce it to Eric.

We do not have hot, humid summer here in Santa Monica like in Japan, but I crave to eat Hiyashi Chuka (Cold Ramen) every summer, so I had to make it again this summer.

It is like cold soba noodles, but a much uplifted and happy feeling and cools my palette when I eat Hiyashi Chuka (Cold Ramen); verse cold soba gives me cooling, but a grounding, contented feeling. 

You can create what you want to put on the top. I like cucumber, seitan/tofu, scallion, green shiso leave, and homemade red shiso pickled ginger on top.

Japanese karashi hot mustard is on the side, with homemade tamari (soy sauce) and sesame seed sauce.

I have seen Hiyashi Chuka packages in the Japanese market, but they are full of MSG and preservatives, so I have never used them. Vegan ramen noodles are available at natural food markets here, but if you can’t find them, you can use other vegan noodles.

I hope you try making it; then you will know how delicious and enjoy summer ramen!

Hiyashi Chuka (Cold Ramen) Recipe

Servings: 2~3

For Hiyashi Chuka Sauce

  • 6 Tbsp Tamari (soy sauce)
  • 2 Tbsp Mirin
  • 2 Tbsp Lemon juice(if you want sweeter taste use orange juice)
  • 1~2 Tbsp roasted sesame oil
  • 2 Tbsp Kombu dashi* or water
  • 1 Tbsp toasted sesame seeds
  • ¼ tsp grated ginger
  • ½-1 tsp la-yu (option Japanese chili oil)

For Toppings

  • 1~2 Japanese or Persian cucumbers (or ⅓ English cucumber, julienned)
  • 3 Red radish (cut into thin strips)
  • ½ tomato (cut into wedges)
  • 3-4 slices Seitan (cut into thin strips)
  • 2 scallions (cut into thin strips)
  • 3 Green shiso leaves (rinse and pat dry)
  •  Red shiso ginger pickle (benishoga, kizami beni shoga, if you buy them at the store, make sure there is no MSG)

For Hiyashi Chuka Noodels

  • 2~3 servings of fresh vegan ramen noodles (6 oz or 170 g of fresh noodles per person)
  • 1 Tbsp toasted sesame seeds (optional garnish)
  • Japanese karashi hot mustard (optional side garnish)

To Make Sauce:

  • *Kombu dashi – Stove top method: combine the kombu and water in a saucepan over medium-high flame. Bring to a boil, reduce the heat and simmer for about 20~30 minutes. Strain out the kombu and use it for sauce when it cools (this recipe from Love, Sanae).
  • Combine all the sauce ingredients in a medium bowl and whisk them together. You can keep it chilled in the refrigerator for up to a week.

To Prepare Toppings:

  • Cut all the topping ingredients into thin strips (so it’s easier to eat with noodles).

To Cook Noodles:

  • Bring a big pot of water to a boil and add the noodles. Separate the noodles before dropping them into the water. Cook according to package directions. Drain the water and rinse the noodles to remove starch. Soak the noodles in a bowl of ice water to cool. Drain thoroughly and divide the noodles into individual plates/bowls.

At last:

  • Place all the toppings and put Japanese karashi hot mustard on the side. Pour the sauce just before you eat with your favorite amount. 

Bon appétit! 

Love,

Sanae ❤️

Elderberry Enzyme Syrup & Juice

One of the seasonal works I do in summer with Eric is harvesting wild elderberries in North Fork.

It is usually after Umeboshi plums making in the end of June to the end of July.


Elderberry has antioxidants and many benefits for our health.

I posted my blog before on how to make elderberry tea with more information about its benefits.

https://sanaesuzuki.com/2017/02/27/healing-elderberry-tea/

I was making elderberry tea with dried elderberry most of the time since I could not harvest many fresh ones, but last year the timing was perfect when I went to North Fork, so I got so many fresh elderberries.
I saved some to dry for making tea later and tried to make enzyme syrup, juice and jam with extra fresh elderberry.

I only made Ume plum enzyme juice and Kombucha, so I did not know how elderberry works for making the enzyme syrup/juice. Wow, wow…it was so delicious.  Beautiful enzyme bubbles!!!

I wanted make it again this year so every time I went to North Fork this year, I checked elder trees and hoped I would be able to harvest enough fresh ones this year too.

The elderberry flowers had a soft aroma (I made syrup and skin oil with the flowers, which I will share someday). After the flowers, the green berries were so cute.

Elder trees did not disappoint me. Thank you, elderberry trees!

Here is the juice I made this year.

It is similar to Red Shiso Juice I shared before.

https://sanaesuzuki.com/2019/07/22/red-shiso-juice-delicious-summer-remedy-drink-for-health/

The difference is I did not add any water and no cooking. It is only elderberries and beet sugar. They are fermented together.

Elderberry Enzyme Juice Recipe

Ingredients

  • 300 g (about 10 oz) fresh elderberries
  • 150~600 g (about 5~20oz) sweetener (I used beet sugar) 

To make juice to drink

  • 1 tablespoon, less or more (depending on how sweet you want)
  • 1 cup, cold sparkling water, cold spring water, or hot spring water
  • 1 tablespoons, lemon juice and a slice of lemon

Instructions

1. Prepare elderberries; trim the stems from elderberries after harvesting them. You can leave some of the leaves and stems for enforcing enzymes. There might be insects, so be careful handling them.

2. Wash elderberries with water and cleans them carefully. 

3. Strain the water of elderberries in a basket and dry them as much as you can.

4. Place elderberries in a bottle jar and add beet sugar.

5. Shake the jar to mix them as much as you can.

6. Leave them a cool dark place near you and shake it every day or every other day. You can also mix it with your clean dry hand.


7. It should be ready to drink in about 3~4 weeks.

8. To drink Elderberry enzyme syrup as juice, you put 1~2 tablespoons of elderberry enzyme syrup and add about 1 cup of cold sparkling water or spring water. I usually do not put ice cubes, but If you like, you can add ice cubes. Lemon juice and a slice of lemons enhance the taste too.


You can also put hot/warm water for someone who loves a warm drink/tea.

I hope you like it and enjoy Elderberry Enzyme Juice!

Love, Sanae ❤️

P.S. Here is Elderberry Mocktail recipe that I posted for new year, if you like to try something new.

https://sanaesuzuki.com/2020/12/31/new-year-elderberry-mocktail/

Gluten-Free Oil Free Vegan Plant-Based Baked Donuts

Gluten-free and none-fried donuts and vegan plant-based? 

Enough to satisfy health-conscious donut lovers.

Autumn and winter’s weather is getting cooler and cold, baking and longer cooking are warm up the house, and the aroma of baking foods and snack help to ground our energy. Instead of going out like summertime, we stay home and read, write or create inside at home is a natural universal order. Restful activities support our health for next spring.

The original recipe of Gluten-Free Baked Donuts is on Eric’s revised dessert cookbook “Love, Eric,” none-fried donut, but it has a little oil in the ingredients.

If you are interested Eric’s desserts cookbook, you can purchase from my website https://sanaesuzuki.com/product/love-eric-revised/

Gluten-Free and None-Fried Vegan Donuts Original with oil

Make 12 donuts

For the donuts:

3⁄4 cup gluten-free flour mix

 1⁄2 cup almond flour

 1⁄4 cup arrowroot powder

 1 1⁄2 teaspoons baking powder

1⁄2 teaspoon xanthan gum

1⁄4 teaspoon sea salt

 1⁄8 teaspoon baking soda

1 tablespoon fresh rosemary, chopped

1⁄3 cup maple syrup

1⁄3 olive oil

juice from one lemon

zest from one lemon

1⁄2 cup hot water


For the toppings:

1/2 cup almonds, pistachios, walnuts, pecans or any other nut of your choice

olive oil for brushing donut tops


To make the donuts:

1. Combine the flours, arrowroot powder, baking powder, xantham gum, salt, baking soda and rosemary in a bowl and set aside.

2. In another bowl, mix the wet ingredients until creamy.

 3. Pour the wet ingredients into the dry mix, add the lemon zest and stir until the mixture is slightly lumpy.

4. Using a 2-ounce ice cream scoop, pour the batter into a donut pan and bake at 350°F until golden brown, about 16 minutes.

To make the topping:

1. Place finely chopped nuts on a plate.

2. Brush the tops of each donut with olive oil and sprinkle with chopped nuts.


Recently, Eric created gluten-free and oil free baked donuts recipe for Chef AJ’s youtube show. It will be on Saturday, November 14th, 2021, at 11 am by Zoom. You can see it on her Facebook too.

Now it is on YouTube.

Gluten-Free Oil-Free Vegan Baked Donuts 

MAKES 12 DONUTS

For the donuts:

3⁄4 cup gluten-free flour mix

 1⁄2 cup almond flour

 1⁄4 cup arrowroot powder

 1⁄2 teaspoons baking powder

1⁄2 teaspoon xanthan gum

1⁄4 teaspoon sea salt

 1⁄8 teaspoon baking soda

1⁄3 cup maple syrup

1⁄3 coconut yogurt 

1⁄2 cup purified hot water


For the toppings:

1 tablespoon kuzu (also known as kudzu medicinal starch)

½ cup purified water

½ cup strawberry jam or maple butter

To make the donuts:

1. Combine the flours, arrowroot powder, baking powder, xantham gum, salt, baking soda in a bowl and set aside.

2. In another bowl, mix the wet ingredients until creamy.

 3. Pour the wet ingredients into the dry mix and stir until the mixture is slightly lumpy.

4. Using a 2-ounce ice cream scoop, pour the batter into a donut pan and bake at 350°F until golden brown, about 16 minutes.


To make the topping:

1. Mix the kuzu and water in a pan, bring to medium heat and frequently mix until clear and thicken. Add the jam or maple butter and mix again.

2. Top each donut of jam with a spoon.


I enjoy my baked donut with my roasted brown rice twig tea or grain coffee.

Enjoy your delicious baked donuts!

Love, 

Sanae ❤️

Healing Balance in Season – Late Summer

The common season we usually know is four seasons.
I have been practicing “The Five Element” theory of five seasons since 1993.

Spring – Wood 

Summer – Fire

Late summer – Earth/Soil 

Autumn – Metal

Winter – Water 

as the principal elements of the material world. 


Each season has a different balance of our health with foods, ways of cooking, and lifestyles.

Quick examples: 

Summer is a hot season, and you eat cooling food with quick-cooking.

Lifestyle is active. Wear light material clothes and open the window. Use fun or AC to cool down. 

Winter is a cold season, and you eat warm food with longer cooking, presser cooking, stewing and baking. 

Lifestyle is time to slow down, wear warmer and thicker material clothes, close the window. Use a fireplace or heater to heat our house.


I live in Santa Monica, California  – the northern temperate zone is in late summer season right now. Late Summer begins around the third week of August and runs through the Fall Equinox, which is late September.

Do you know what to eat for late summer?

According to the five elements, it is Earth/Soil season.

Late summer is around 3 pm of the day when we take a little rest to have tea and something naturally sweet.

For whole grains, sweet rice, millet is supporting us in late summer – earth/soil energy organs of spleen/pancreas and stomach.  And round vegetables (cabbage, kabocha squash, cauliflower, etc.) are recommended to eat.

One of my self-published cookbooks, “Love, Sanae” has more details on what foods support each season, not just grains and vegetables, page 88~91. I hope you check them up!


I want to share late summer season balanced whole grain millet recipes today.

Millet is rich in plant-based protein, whole grain and fiber, nutritious, non-glutinous (non-sticky), and not acid-forming foods, thus making them very easy to digest when you learn how to cook.

Millet supports pancreas and spleen organs which need to focus in late summer.

I showed how to cook millet in my cooking classes every late summer:

Millet and Kabocha Squash with Roasted Pumpkin Seed 

MAKES 4 SERVINGS 

1cup millet

4 cups purified water

1 cup kabocha squash, cut into about 1” dice

1 “ kombu kelp

1/2 cup roasted pumpkin seeds

1. Wash millet: 

1) Place a strainer into a larger bowl and fill it with purified water. Wash millet gently, stirring with your hand in a counter-clockwise direction when you want to be more energetic or in a clockwise direction when you want to be more relaxed. 

2) Drain the water (reserving it to water your plant later) and repeat the washing step three times or until the water is almost clear. 

3) Strain the millet and cook as it is or soak or roast, depending on your health condition. 

2. Place 4 cups water in the large pan and bring to boil. Add millet and Kombu kelp. Reduce heat to low and add Kabocha squash and cover and simmer for 30 minutes.

3. Meanwhile, rinse the pumpkins seeds and strain them, and roast on a skillet.

4. When millet and kabocha are done, remove from the flame and allow to sit another 5~10 minutes.

5. Take the cover of millet and kabocha. Use wood rice paddle or spoon that has moistened in water to prevent sticking, stir gentle from outside.

6. Serve with the roasted pampering seeds.

7. Itadakimasu (bonappetit)!

Here is youtube link how to make “Millet and Kabocha with Roasted Pumpkin Seed”,


Creamy Millet with Fresh Parsley Sauce

MAKES 4 SERVINGS 

1 cup millet

5 cups purified water

pinch sea salt

Fresh Parsley Sauce

To make the millet:

1. Wash millet: 

1) Place a strainer into a larger bowl and fill it with purified water. Wash millet gently, stirring with your hand in a counter-clockwise direction when you want to be more energetic or in a clockwise direction when you want to be more relaxed. 

2) Drain the water (reserving it to water your plant later) and repeat the washing step 3 times or until the water is almost clear. 

3) Strain the millet and cook as it is or soak or roast, depending on your health condition. 

2.In a large saucepan, bring the water to a boil. Add millet and sea salt. Reduce heat to low, cover and simmer for 30 minutes.

3. Remove from the flame and all pan to site undisturbed for another 5 to 10 minutes before you remove the cover.

4. Serve with Fresh Parsley Sauce.

5. Itadakimasu (bonappetit)!


For the parsley sauce:

2 table spoons kuzu*

1 cup purified water

1/4 cup parsley, finely chopped and squeezed of excess water

sea salt

To make the parsley sauce:

  1. In a small saucepan, combine the kuzu and water/ Stir well until kuzu is completely dissolved.
  2. Place the saucepan over a medium flame, bring the mixture to a boil, stirring constantly. Cook for about 1 to 2 minutes.
  3. Add the chopped parsley and cook for another minute. 
  4. Serve over the Creamy Millet. 

*Kuzu (kudzu)-A white starchlike extract made from the wild root of kuzu vine; used for thickening soups, beverages, desserts and sauce. Also used for medicinal purposes.


One of my self-published cookbooks, “Love, Sanae” has more millet recipes and also shows what kind of whole grains, vegetables, beans, sea vegetables, cooking style and many more for each season. 

If you want to purchase my book from me directly, please email me at sanaehealing@gmail.com


After surviving two different cancers and a near-death car accident, healing balance is vital to know. 

Knowing what foods support us each season takes time to learn. 

I also realized our health has seasons.  Finding out which season your health is in is critical—and understanding what and how to apply your health seasons is the key to heal yourself.

I hope to share what I have learned from my experiences with you when the time is right.

Love, 

Sanae ❤️